Further basic information about raising clematis seedlings.
Beginning of the season/prior to the season
We're concerned with seedlings germinated within the previous twenty-four months, due to flower in the current season. Once the young seedlings first resume growth after Winter, or preferably a little before, you will definitely want to re-pot all plants that will benefit from a re-pot - that is, most of them, into the next-larger size pot. This gives a new batch of soil or compost, and a new source of nutrients; and space for the most important part of the plant - the root. The display of the plant depends on the root. When you re-pot, have a glance around the root to check for any insect 'nasties' pertinent to your area. If you notice any such affected pots isolate them and treat them, before returning them for re-potting .
Many, if not most, seedlings may resume growth before Spring really starts - as pertaining to my Northern England location. For example, seedlings from last year, in unheated greenhouses, this year began to sprout again in January, well before the Winter frost had passed once and for all. So expect seedlings to be frozen, thawed, and re-frozen, over the local cycle, and don't worry if the time you have for re-potting coincides with a time when the compost ball around the root happens to be frozen. Just re-pot them anyway. This year the re-potting of 114 large-flowered hybrid plants was done whilst all were frozen solid. Within twenty four hours, the new soil also had frozen, nevertheless when they eventually thawed several days later, all appeared fine, and have subsequently done well. Clematis are tough plants.
Organisation
Get a diary for your greenhouse, an ordinary one is fine - for noting occasional things down; things like: what quantity of feed you used, when things happened (for example, date extension growth resumed after Winter, re-pot dates of particular plants, onset of high insect levels, weather particulars, date of last frost - whatever seems significant; preferred fungicides: nuggets of information upon which you happen, in relation to the nature of particular plants, as you go about your hobby, the date you first needed to spray insecticide, the date in the season when it was necessary to provide shade, etc, etc), for future reference. It sounds boring, but it really is the very most important thing! After a few years your clem-raising notes will become as valuable to you as Bob Monkhouse's joke-books are to him!! (An English comedian well-known for keeping records of a very large number of jokes and quips, anecdotes and other funny items over the fifty-year period of an illustrious career.) Far and away better, a five-year diary, so that you can compare notes from previous seasons, right there and then, with no effort.
(Keep it, by default, inside the home, you don't want your extremely valuable information to be outside for too long). Keep a separate book for hybridisations; some suggestions as to what might be helpful to record in that notebook are on the hybridising page of this site.
You can't remember it all, so write it down, to refer back to.
Numbers
The amount of work is proportional, though not directly, to the number of seedlings you raise. When you have everything in a good routine, 50 seedlings are not too hard to manage. You could if you wish manage them as seven lots of seven seedlings, one lot per day, for watering and feeding purposes, in terms of the division of the week. You could in theory deal with this number in a few hours of one day of the week, if that pattern was necessary for your schedule. Unfortunately though, seeing/visiting seedlings only once a week is not really good enough, because other problems and maladies will be at work at a faster rate than you; if you only see seedlings once a week problems will develop, making remedial action necessary more or less all the time. So look through your regular week, and see what time is usually spare (!) or can be made to be; and spread your efforts as evenly as possible, over the week, so as to give the plants consistent attention, throughout.
Preparation
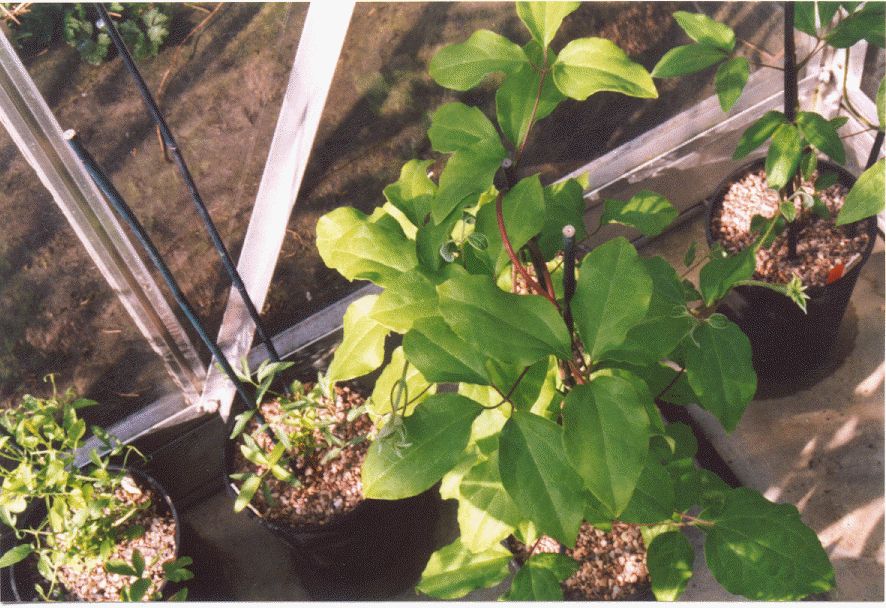
Before the beginning of the season, go and buy sufficient one and two litre pots, (get deeper pots, not shallower ones; clematis seedlings like vertical space to develop the best roots) a good quantity of compost, a batch of fungicides and insecticides, a couple of different brands of good NPK powder feed or liquid feed, plastic-coated wire ties, a quantity of NEW stakes 24" long (at least two for each seedling), grit, some sticky traps for greenfly, rubbish bags, etc etc - all the "consumables" necessary, so they are to hand when required.
You've been promising to clear out the greenhouse and wash it down, remove detritus and accumulations - do it before the season really gets going.
Gardening
"Gardening" = the day-by-day of raising seedlings.
You will need to "garden" - take care of - your seedlings at least three times per week, more = better. It's enjoyable and straightforward. By "gardening", I mean: keep plants restricted to two vines throughout (see later), by the removal of new growths from soil level (but always check to see if any of such new vines have flower buds immediately obvious, at their tips); to tie-in extension growth of vines, to keep the plant under control; to water; (RUNNING A HOSE permanently to your greenhouse will pay big dividends, or get an outside tap fitted); to feed; to check for pests and problems; to change the orientation of the plant in relation to ambient light, and air circulation. Don't worry about this last point, just do it! Don't leave any plant on the same spot for six months! It's important to change their position and orientation, by degrees, even. The "gardening" aspect is the ongoing process. Like other young, seedlings will need help and won't "look after themselves" for too long.
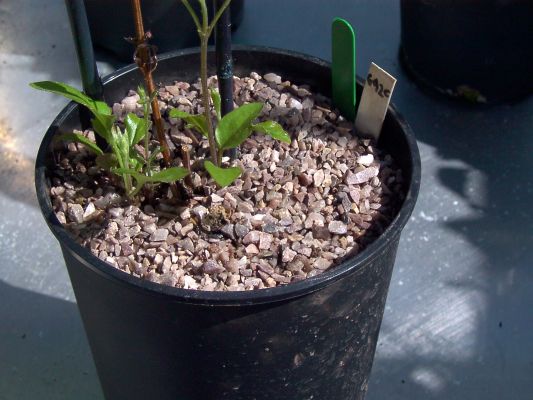
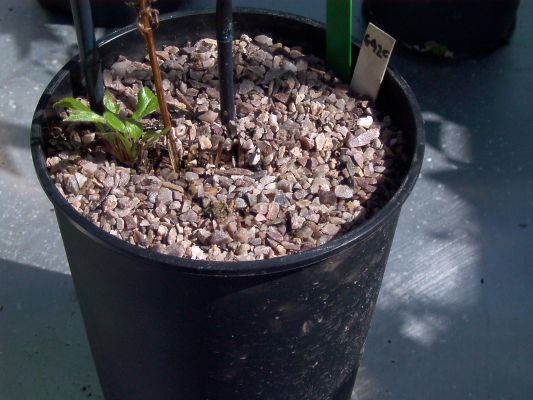
Mix some gravel, grit - whatever you want to call it - small-size stone material - into your compost, whenever you make up a batch. Providing grit to about 10 - 15% will best help the root's health; if the root is in good health it might best be able to support vigorous bud and stem growth.
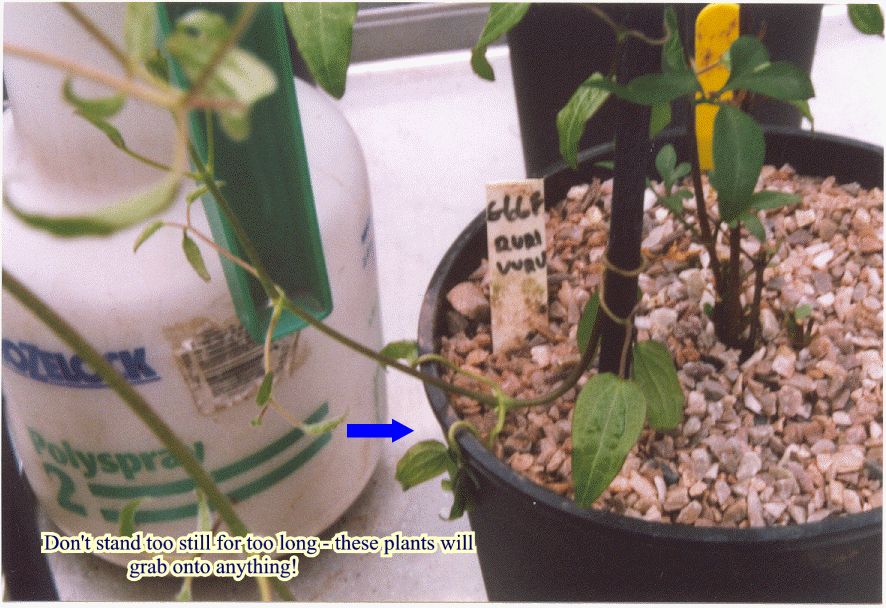
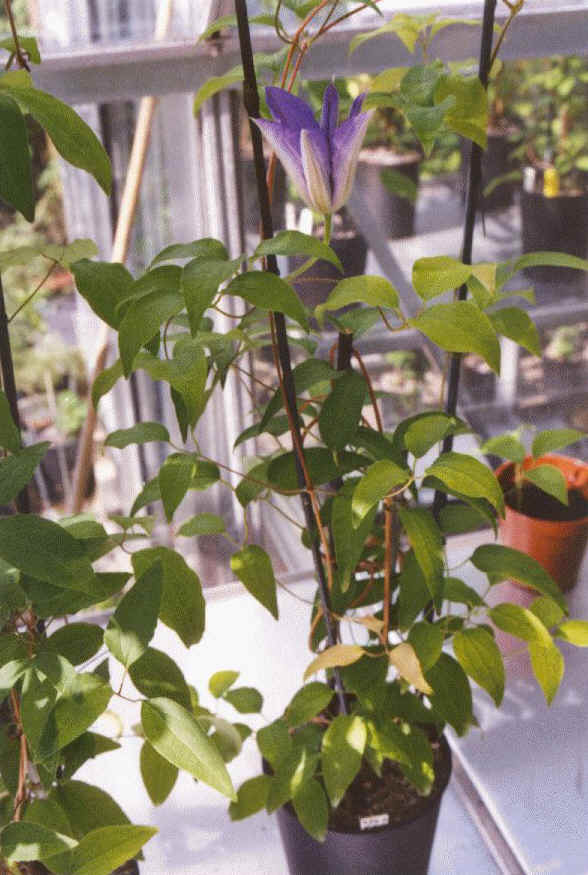
At first, tie growths in, to the first stake, as they appear, then when the vine attains a height of several inches above the top of the stake, bend the vine down and neatly tie (use plastic-coated ties) onto a second stake, making the growing tip "look in a downward direction". Photos to follow! The vine will continue to grow; it will extend, and curl back to the vertical, to grow straight up again; when sufficient further new growth exists - the next 3 to 6" - tie this in, further down the second stake; you won't hurt it because the vine is still soft at this stage. The aim is simply to control the vine growth by keeping things neat, tidy, and manageable.
After some time the leaf stalks from the earlier, older, leaves will wrap around the stakes, attaching themselves firmly, and some of the earlier tie-wires can be removed and used further down the plant as required, to tie-in newer growth. So don't keep endlessly attaching new ties - the plant, once it has attached itself, no longer needs those added early-on. The ties are only used to guide the vine where you want it to go, after that the vines will wrap themselves into the position by their own efforts. Later on, new ties won't be needed, because you can direct the growing-tip back through and between the already established vines - the growing-tip leaf-stalks will wrap onto the vines already established.
The result is a compact neat plant, easy to deal with, water, feed, and move around.
Once you see flower buds, you are reaching the point where not too much further "gardening" is required - from here, the plants need only normal feed and water, care, and an eye to check for insects etc each time you visit, as they will soon be concentrating their efforts on enlarging the buds in preparation for the opening of flowers.
Feeding
You can work out a rota for feeding. After some time in a one-litre, or, for that matter, a two-litre, pot, seedlings will eventually begin to show signs of deficiency. We're concerned with seedlings germinated within the last twenty-four months: if you carry on watering, but not feeding, the plants will suffer and ultimately die because they will be starved of nutrients. The nutritional deprivation isn't usually the immediate direct cause of death; that will be down to the effects of pests, or disease, which are all-the-more effective because the plants will quickly become very weak. Actually you can usually rescue plants in this neglected state, by carefully looking at the root, and potting into fresh moist earth, by pruning the stems and feeding the plant immediately, de-bugging them (insects) and with the application of one or more doses of different fungicides, depending on what you judge is necessary. Even in dire circumstances these plants will still try and survive for you.
To avoid the problem, be aware that you'll maybe want to feed plants from April or May to August or September, in the main. You won't be feeding all of them through the entire season - some will flower earlier, and once that's happened you can prune those plants, if you wish, and move them on into the "have flowered" group; because they have been pruned they will require much less feeding input thereafter.April - September is six months, or twenty-four weeks. You want to aim to be feeding your mainstream plants about weekly or so.
Do ensure the plants get ordinary fresh water instead of feed, from time to time, if you over-do such 'feeding' you will get a build-up of chemicals in the pot.
Work out, from the dilution instructions given on the labels, the approximate amount of liquid/powder feed needed each time, then standardise so that you make up the correct amount of feed each time, quickly and without having to go back to the calculations each time. Write on a label, and stick it onto the container - I really mean something as basic as "two teaspoons/measures powder per 10-litre bucket". That way an essential recurring task is kept to the minimum effort needed, and should always give good results.
Slow-release fertilizers can be helpful, in your potting mix.
It's easy to use powder-type fertilizers to make up a solution of feed, and pour onto the compost (topped with a layer of grit as per the photos elsewhere) in the pot. Use a few types of feed; there are several available from the usual stores; the Phostrogen powder feed is good; also B & Q's general powder feed, with a similar formulation, is fine. Always alternate between feed formulae; regardless of what it says on the label, I can assure you, the contents will vary. Keep two or three different feed formulae, and alternate from one to the other if possible.
Watering points for seedlings in one and two litre pots.
You check if a pot needs water by its weight. If you have a reasonable number of pots on the go you will be lifting the pots for short spells on a random basis anyway, to inspect plants, buds etc; after a while you notice when a pot feels light. Straight away you are aware at least some of the pots need a drink. Weather conditions vary, so although you might have a regular watering routine an occasionally particularly warm spell or cooler spell will cause faster or slower transpiration, and evaporation. So check one or two pots every time, and you'll find pretty soon that you either advance the occasional watering, because you realise some pots are light; or sometimes retard a watering, because you find that the pots are still fine.
If the compost in pots is allowed to really dry out, water, when eventually given, will run straight through, down, and outside of the pots before the compost can get really wet. You may have to water a few times, before the compost comes back into good condition, so that the roots can take up liquid and nutrient from the moist.
Watch your pots; make sure feed is always to hand; don't let them dry out too much; strike a balance between feed and plain water; any signs of malnutrition, act straight away by, if need be; re-wetting compost, feeding, watering, and pruning. Keep on top.
One or two other (usually infrequent) problems to do with watering and aeration.
Watering - IMPORTANT
Pots don't normally dry out too much, because your regular watering cycle prevents this.
However, if you are handling a considerable number of pots, you can accidentally miss a few, a few times, and, before you know it, you might notice problems, and not be able to figure out just what's wrong with a plant, or certain plants.
If the soil in a pot becomes quite dry, a significant percentage of the root may well lose intimate contact with the soil - you might not be able to see it right away, even if you remove the pot, and look - but for sure, when the compost dries out completely, the root loses intimacy with the soil.
Even if you water such a pot, most will run down the sides, and straight out, through the holes in the base. The plant just can't bring in liquid, even if it wanted to, because the root is not sufficiently in contact with the medium/moisture. Once dry, the compost doesn't really get re-wetted properly, by typical light watering, and remains in poor condition, thus causing the plant to be unable to correctly import water, dissolved nutrients and so forth. A general growth malaise can result, and you start noticing increased insect activity, or discoloured leaves, or other symptoms suggesting that all is not well.
The remedy that works best for me is to 2/3rds fill a bucket with liquid feed, then take the pot, and plunge the entire pot into the liquid within the bucket, to a depth above the base of the stem of the plant, allowing the liquid to permeate absolutely, for about four or five minutes. You will be surprised by the amount of air that is purged from the soil, and bubbles, loudly, to the surface. When all the air is purged, the bubbles cease, and after another minute or so, the plunge is sufficiently complete.
I myself always put a layer of gravel, on the surface of the soil, in my pots - don't worry about losing the gravel, you won't; just plunge the pot carefully, so that the liquid level is above the gravel, and allow to soak. Then rescue the pot and allow to drain. Spray with an anti-fungal, and then, when properly drained, give a good measure of liquid feed.
Plunging the pot like this once or twice won't leech out too much nutrient from the soil, but don't do this too often, (you really should not need to) or you will need to replace some of the soil with some fresh, nutritious compost, after plunging. It can be handy to apply some slow-release fertiliser, mixed into a small amount of fresh medium. Pour out the gravel first, tapping the pot, onto a newspaper, then remove a bit of old soil and replace with the new. Replace or renew the gravel, and water-in the new compost. If at all in doubt about the quality of the old medium, re-pot into the next-large size pot using fresh compost/medium.
If you, along the way, get a big problem of this type - that is you need to plunge a fair number of pots - don't worry, even pretty doubtful cases, within reason, will usually revive, and come back strongly, once the root is cared for.
Once the soil has been thoroughly re-wetted, the root will be able to resume normal development, assuming that zero, or only minor, root damage has occurred, in the interim. In the event that some of the root has died, and turned black, cut out this part of the root and discard it. The roots, too, of clematis, are tough, and will endeavour to re-grow, once back in good contact with moist and nutritious medium.
Aeration
It might seem far-fetched, but you can do everything else just right, and still get general growth malaise, if plants remain for long periods in a stagnant environment. Your greenhouse might permanently have a window open, and not look "stagnant", but after a period of time the plants begin to react against poor aeration, and can develop loss of vigour; foliage problems multiply, and insects and other malaises establish more easily. It might seem obvious but the reason that greenhouses have vents is because these (not visual) problems have been noted many times before! Therefore, keep your greenhouse ventilated by ensuring passage of air via the main window, and the vents. If you don't have vents as well as a window, (as in my case) simply open the main door and allow good air passage every day. Keep the cats out! Close the house/s at night, open them in the morning. The plants will be much the better for it. You can do everything else right, and still find yourself wondering what's wrong, but for the want of a little better air movement. In turn the air movement is likely to keep fungal problems in check.
Anti-fungal measures
Assuming good ventilation, fungal problem are generally not too much of a worry, if you keep things clean, and if good growing conditions exist, but no-one is immune. If seedlings have clean-enough conditions, good air movement, good regular watering, and feed, the likelihood of fungal problems is quite low. Occasionally you will get at least some occurrence: keep at least two types of systemic fungicide, and into the bargain, keep at least one brand of contact fungicide. Just get them from your local garden centre. If a minor problem develops just deal with those plants affected, straight away. If a more serious infection breaks out, take stock of the problem, and then treat all plants with a good systemic fungicide in the first 24 hours - as soon as possible. Cut away from the plants any badly infected areas - when in good health again they will soon re-sprout. Then feed, as soon as possible. Give the plants 24 hours then spray once again with your no. 2 fungicide. That will probably solve most of the problem, but if some plants are still affected, isolate them, prune well, and re-spray a third time, using your fungicide choice no. 1. If you encounter any spiders or other deleterious insects at any such time, remove them immediately. If need be, cut away badly affected areas, spray an anti-insecticide, and give air and feed. When necessary, plants recover fine from surgery. Keep weakened plants in good, but indirect, light until at least somewhat recovered, then get them back into a sunny spot..
If you do get problems, the sooner you attack them, the better; usually the correct treatment will clear most of the problems; restoring conditions to equilibrium, within a few days. Any plants that don't make it, dispose of; don't worry without end, because, at the end of the day, they are only plants. If you lose an important one it will remind you to be more attentive or better prepared in the future. But you sometimes lose a plant no matter how well you look after it; that's the nature of things, and you'll from time-to-time lose one or two no matter what. Having said that, it will be relatively unusual to completely lose a plant, but it does happen nevertheless. If you do apparently lose a plant, really make an effort to keep the pot in the best conditions you can until at least the beginning of the next season, you might be surprised with new growth the following Spring: this certainly does happen from time to time. An example is G67 patens on 2001 new flowers site page. This flowered and "died" all within five weeks. It was a real shame, as it was a lovely bloom, and I was disappointed and annoyed with myself that I'd allowed it to happen. Anyway, I dug out the root, and it looked completely defunct to me; and I have seen a few seedlings' roots! I more or less discarded the pot, but then had second thoughts, and put back a handful of soil and fresh mix. That was in about July. This Christmas, I was having a clear-out and came across the pot again, where I'd left it some 6 months earlier. Well! I was absolutely delighted to spot a fresh green shoot from the soil; and it is now just reaching flowering again! Lucky!
Towards raising larger numbers of plants.
You'll know when you're ready to move to higher plant numbers because you will by now have had some successes, and be confident about being able to fulfill the increased time and attention requirements.
How many vines?
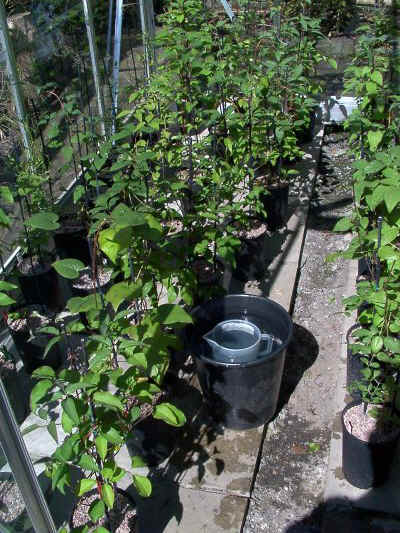
If you grow one or two plants only, you'll find there are no problems to water, feed, ventilate, re-pot, etc your plants as required, and the seedlings will send up several vines, which you can coil around stakes, until flowering occurs. When you have a few more plants, the labour required begins to increase markedly, because vines will become vigorous, demanding your attention every day or so. New growth appears at the base of the plants and must be catered for, or nipped out, as it forms.
before after
Once you get past a certain number of plants you will find yourself very busy indeed, or even TOO busy, to cope with all the growth and tieing-in, as well as watering, feeding, etc. There comes a point where all the time available is insufficient!! All the same applies in terms of space. Growing a large number of plants without restricting the number of vines leads to masses of larger plants - and not enough space!
Keep in mind the aim: to produce the plant's first flowers for enjoyment and assessment.
In order to solve these two problems, restrict the plants to a limited number of vines. Remove from all plants all but one, or two, vines. You can cope with much larger numbers of plants, in the same time, if you only allow two vines, and successfully produce good flowers and healthy plants:
Most of the time therefore, you will be raising your plants with two vines, one for the very first flowers, and one for insurance just in case the first vine gets broken or damaged for whatever reason.
But clearly there's a case for just raising on the one single vine; because in the event you lose that main vine, buds in the axils below the growing tip will, in time, come into action, and grow into, effectively, a new "leader". It will obviously delay the production of a flower, but only for a short time period, usually. One can't generalise, because your seedlings will have differing characteristics. Some seedlings are obliging, and flower quickly on short vines, while others take time in growing a long vine before producing flower buds. In the first year or two you won't be absolutely sure which pruning group the new plants will eventually belong to.
In the course of a season you will note that relatively few plants ever actually suffer a mishap, if tended; and the second vine, although not a waste, can be considered largely superfluous. Where you have larger numbers of plants to tend, and you need only to see the first few flowers, then consider pruning down to a single vine at outset. The result is that you can accommodate and manage much larger numbers of plants with the same amount of effort and time. You could of course treat some of your plants in this way, and the others as normal, with two vines.
You can experiment with plants in the normal course of things, by deliberately restricting vines, and also by repeatedly pruning back. In some instances, the plants will continue to form new vines without an immediate terminal flower, in other instances the plant will often throw out a batch of growths with obviously visible flower buds.
By restricting the number of vines you will manage more new flowers each season, with the same effort.
Minor Pests
(Assuming fungal problems are relatively rare). Keep insects, at least the deleterious ones anyway, away, as much as possible. You might or might not prefer "organic" means of dealing with some pests, that's a personal choice. But however you tackle it, managing pests seems to come down to a matter of consistent attention, followed if need be by remedial action. You should be able to keep seedlings, in a modest greenhouse, or in the home, relatively free of insect infestation, by maintaining good conditions, keeping a regular eye on your plants, and by "gardening" regularly and frequently. You can't avoid all insects; for example, the greenfly WILL be there, from time to time; just don't allow the damn things to take over. A low level of insect occurrence is unavoidably natural, so it's tolerable, and the plants won't mind too much, just so long as they are not subject to constant, high levels, of insects.
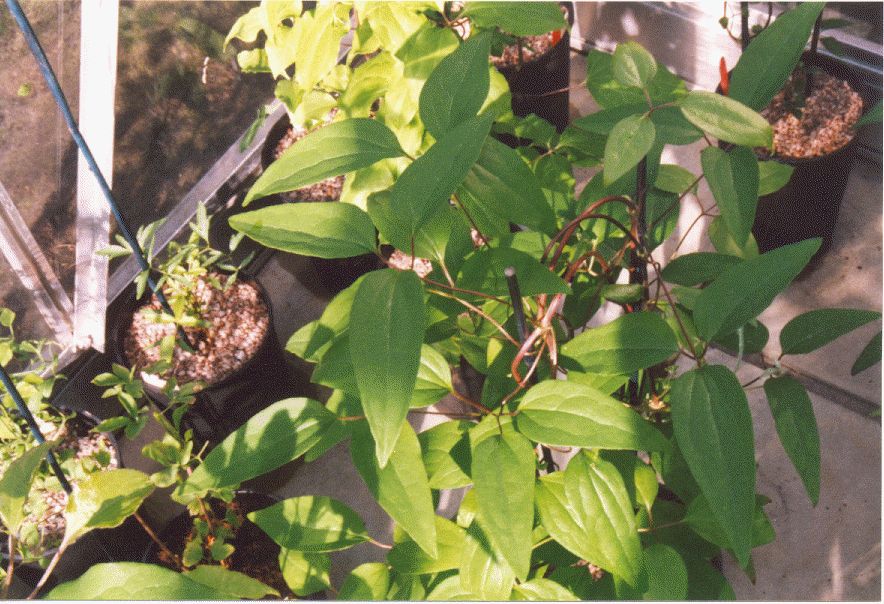
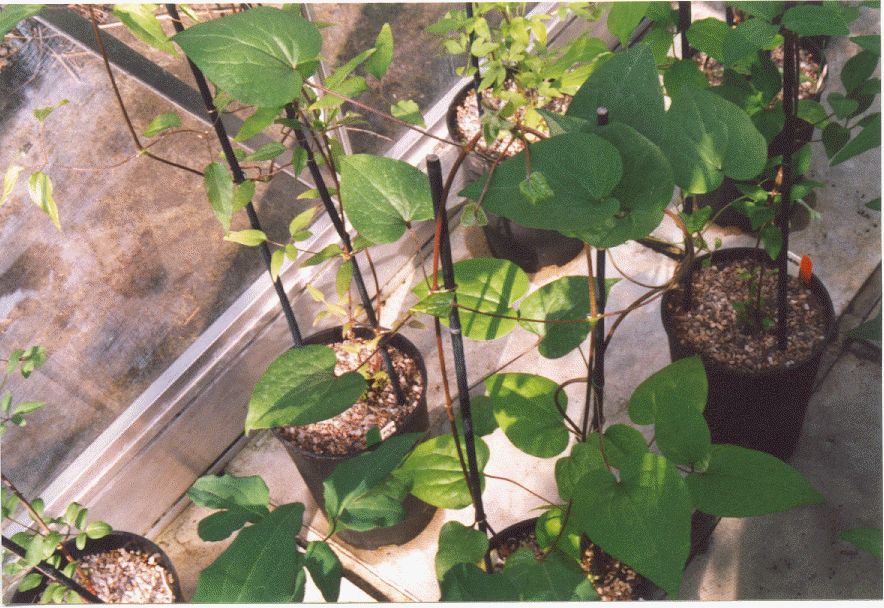
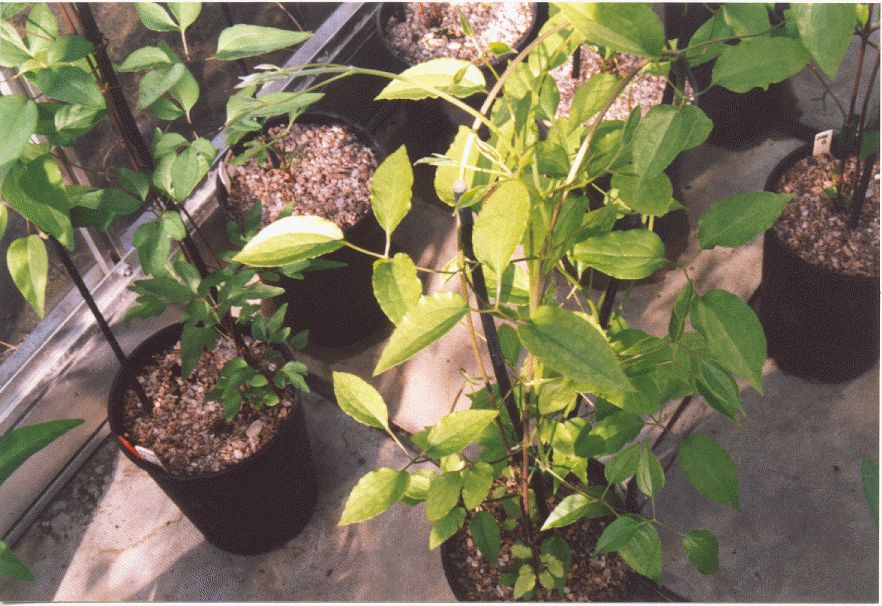
Growth habit variations; large-flowered hybrid plants generally
The plants you raise from a mixture of large-flowered hybrid seeds will usually show marked variance in form. Some seed acquisitions are composed of seed from half a dozen or more large-flowered hybrids, mixed together; and were probably pollinated by pollinators growing nearby, or were self-pollinated, or some of both. (In seed available today we are dealing with a genetic mix contributed to, over a 150 years period, by no less than C. florida, C. lanuginosa, C. patens, C. viticella, and probably others; within this pool exist tendencies to double-flowered forms in all four groups - a very varied mix. If you or I lived to be 200 we'd still get nowhere near seeing all the possible permutations.)
Clematis seeds form as a result of the fusion of cells from the male, the pollen, with the female, the ovary. The genetic identity of both pollen and ovary parts is variable, therefore the genetic identity of each seed resulting is also different, to at least some slight degree, and, often, by a significant degree - therefore the plants raised from such seed show differences in outside appearance to a greater or lesser degree. (See the Hybridisation page for further details).
From such seed, you will ultimately get plants that produce flowers: almost immediately, from the stumps of last year's first vine growth, (from the old wood) in some cases; in others, plants that are spindly, and slow, but nevertheless do eventually flower, often with surprisingly good results; plants that grow a short vine or two, and then flower, still relatively early; plants that go on and on, so you are coiling the vines around, two or three times, and which don't develop flower buds until near the end of the season; plants that are obliging, with beautiful foliage, producing flowers in a burst, from many axils; flowers that have weak-looking foliage, and slow growth, which go on to develop sizeable flower buds, out of the blue; most plants that look promising at this stage usually do survive, and produce flowers: once past the seedling stage loss of plants is unusual.
In the foliage you will notice a range of form; simple, single leaves; heart-shaped leaves; mainly-trifoliate thin leaves; mainly-trifoliate wider leaves; some with serrated edges; some rounded or lobed; smaller leaflets, average leaflets, surprisingly larger-leafed, and various in-betweens: colours range from olive/bronze green, through the green spectrum to quite light greens - the tendency is mid-slightly darker greens; some foliage appears standard, and relatively uninspiring, whilst other foliage can display the most attractive form, and be of a lovely green, glowing with vitality and life, very pleasing to the eye.
Some photos of clematis seedlings' varied foliage: often the healthy foliage of seedlings is very attractive in itself.

Flowers
The buds do vary in shape, and develop at different rates on different plants, as you might expect. In most instances a bud proceeds along for several weeks, then at a certain point begins a rapid expansion toward the mature size; at the same time the flower stalk usually begins to elongate at a great rate, and the swelling bud is borne aloft a long, slender, but firm pedicel, prior to opening. It is frequent to notice a gradual but rapid colour change in the stalk - the pedicel - which seems to start lower down, and move toward the bud, making it seem that pigment is being synthesised lower down, and transported up. Only when the flowers begin to actually open can the colour of the tepals usually be discerned. Flower buds are at first generally fleshy/greenish in varying degree, on the outside - not at all brightly coloured - until after opening, after which they sometimes develop further and become coloured in varying degree on the outside of the tepals. The moment of excitement is that point when the tepals, until now fully packed together within the bud, first begin to break contact, revealing the inner colour! In many cases, the flowers, even at this early stage, can be breathtaking !
On a bright sunny perfect day a flower may open fully within a few, or several, hours; but some take 24 or 48 hours, from the very first glimpse, to fully open. The colour is not usually immediately final, but tends to develop over the first day or so from the flower's opening. The same is true of flowers with a "bar" of slightly different colour; the bar may "fade-in", or out, over a day or two. The plant's first flowers are frequently, but not always, the final form. Sometimes the tepal shape may be slightly imperfect, in some tepals of early flowers, that is, not quite symmetrical; generally, later flowers quickly settle into a more uniform appearance. However some plants' flowers don't seem to change in appearance one iota, from the very first to the umpteenth.
Some flowers are sturdy in build, striking in appearance, and bold in colour, with seven, eight, or even nine or ten tepals; whereas others are light and graceful, diaphanous, fragile, lightly washed with pigment, veined, in the main only 6 sepals. And all variations between! Most are very attractive. Most will have a basic background colour, of either less, average, or greater intensity; occasionally something quite unusual or attractively different may manifest! This can include a broader, or thinner, lighter or darker "bar", or, more rarely a speckled or mottled effect. Some tepals are rounded at the margin, others ruffled, or crimped, at the edges; some are more elongate; others, spatula-shaped; with or without a point at the tip.
The stamens may be more, or less, prominent, with a greater or lesser degree of colour. Sometimes the "boss" is striking, sometimes, not so significant. Sometimes the stamens are hardly an event at all, on first opening, but develop, over the hours, to become a more significant feature in the flower.
Usually the male parent isn't certain, because seeds generally arise by "open" pollination. Flowers, on seedlings of such seed, do sometimes resemble those of the seed parent (known female) in some way, either in the general form, or the general colour tendency. However, the opposite is frequent. A recent batch of seed, a mixture of several all-white large flowered varieties, has yielded a whole range of flower colours (including white) in the offspring. Just because the female parent was white (or any other colour) it doesn't follow that the offspring will be, too. Of course, you rarely know the pollinator of each seed, in such seed mixes, nor whether the label was in fact completely accurate, for whatever reason.
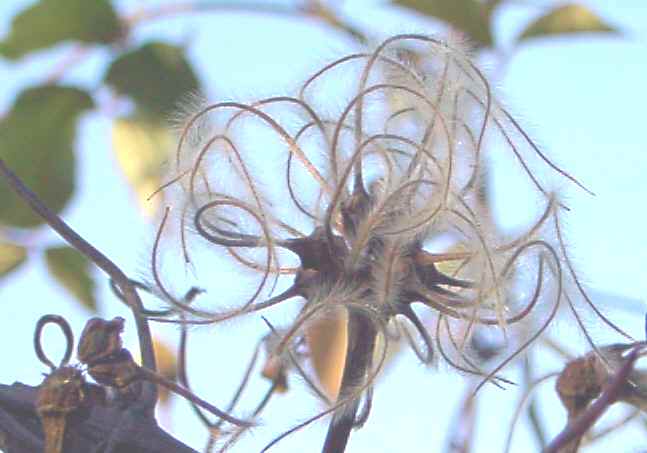
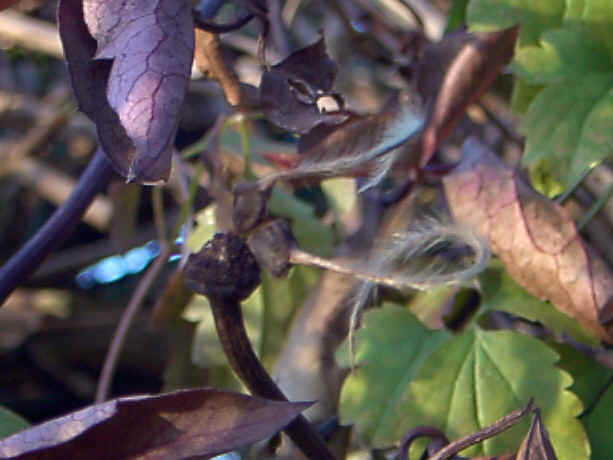
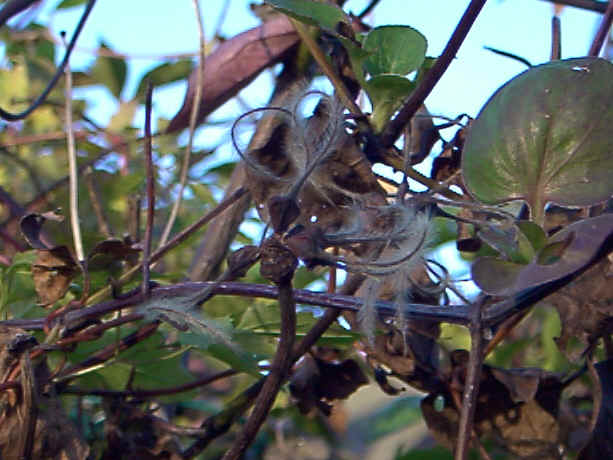
The flower opens fully and begins to develop. Over the course of a couple or so days the bloom matures to its radiant best. The flower then holds it's form for a while, prior to beginning to fade, slowly, before tepal-fall, once it's purpose has been served. The plant then turns it's attention to developing the ovaries, to produce the next generation of seed. The reproductive cycle is complete.
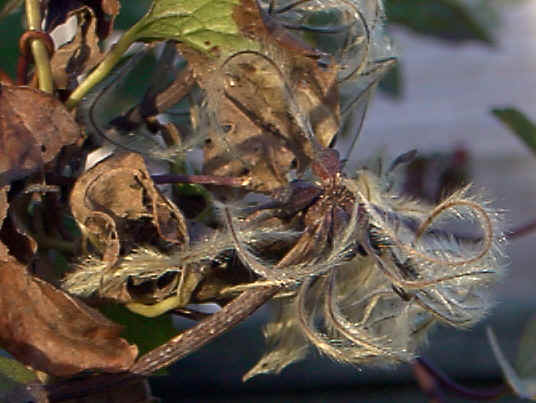
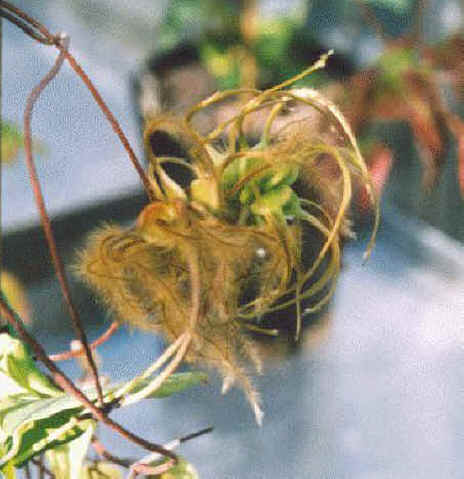
A seed-head of clematis consists of many separate seeds held together, until the point of dispersal. Each seed germinates to produce a unique plant (clematis do not come "true"). The "form" of resulting flowers varies even amongst the different seedlings derived from the seeds from a single seed-head. This is because individual ovaries are pollinated by individual, genetically different, grains of pollen. Or the form amongst such related offspring can happen to turn out quite similar; sometimes a batch of plants arises where they might all have different coloured flowers, but look vaguely or even more strongly "family". Like your friends with six children! They are all different, nevertheless it can be seen that they are all "a chip off the old block".

***
Problems stemming from inadequate time allocation
It's normal, for people who develop enthusiasm in regard of raising new seedlings, to occasionally over-do it, and find they have amassed too many seedlings! The result is something between 'urgent remedial action needed', and 'complete overwhelm'! The problem compounds, because the plants don't stop growing, nor do insects conveniently stop breeding; and to remedy the problem becomes a larger and larger task, by the day! So that puts you off further, and so on.
You can tackle this problem in two steps; firstly, straightway reduce seedling numbers, by pruning down a good proportion of plants immediately; then sort out the remainder, and keep on top of them. Pruning the plants down will bring relief, and the only effect is to delay things a little. If need be, give some duplicates, or similars, to friends. Then decide what the upper number limit is for you, and the time available, and keep to that number, from then on, or until you make a change which results in your being able to handle a larger number of plants, once again. By the way, if this does happen to you, don't fret about it too much, because it's human to err in all things, and in the end is just another part of the learning process!
Keep your seedlings numbers steady, once you know your practical limits.
***