Dealing with new seedlings from germination to the close of the first year; some notes.
Getting brand new plants through from germination to proper establishment. The following notes apply both to new large-flowered hybrid clematis and clematis species plants. Some further photos to be added during the season as things go along.
Regardless of whether you are growing species clematis or large-flowered hybrids, the treatment of almost all clematis seedlings, from germination to the end of the first year at least, is the same. YOU TOO can succeed in raising new plants, even if you've never grown any plants from seed before.
Once you have got seedlings through their first year the danger of losing plants to diseases or insects is very small; pretty soon after that you will be experiencing the opening of brand-new flowers which no-one has ever seen before. It might not seem like it now, but this is a tremendously exciting event, I can absolutely assure you!
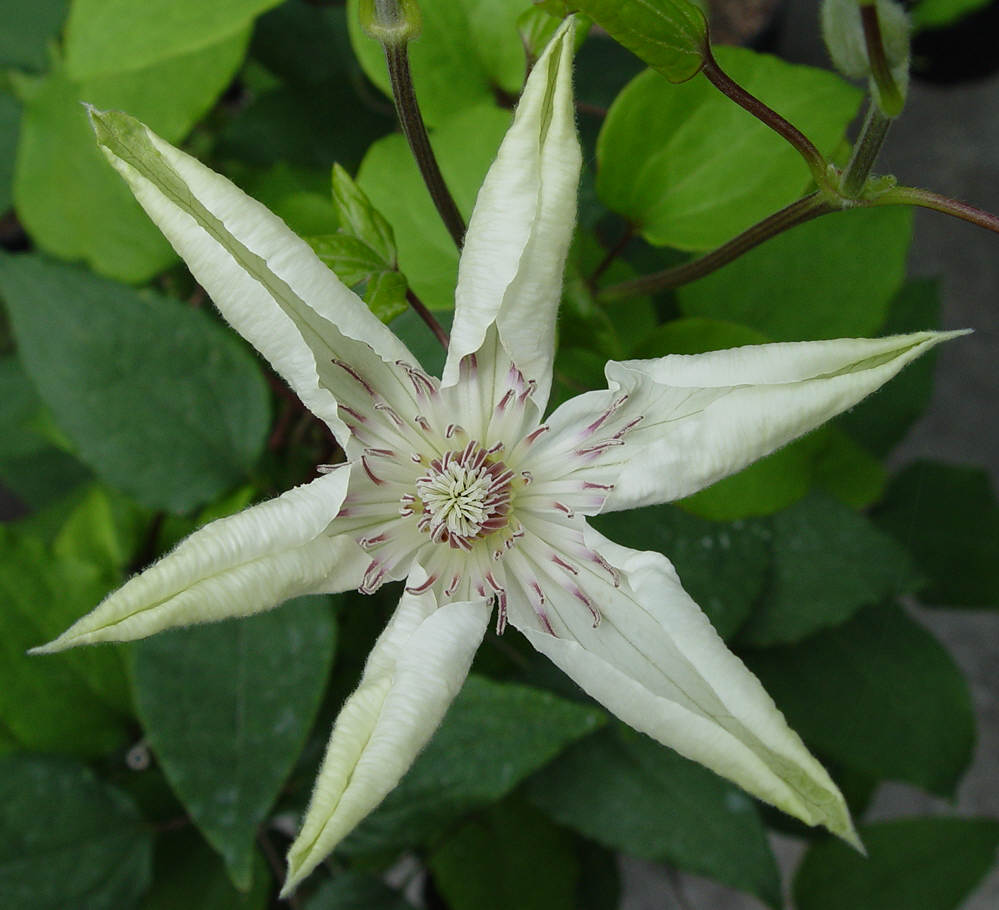
First ever flowers forming on old wood (early March) on this new (grown as) C. patens.
If there is a potentially tricky time it is when germinations occur immediately before the onset of winter's cold; but even then, it only comes down to a bit of care and watchfulness for a couple of months. Any seedlings germinating at other times more or less take care of themselves, given decent raising conditions. The secret is providing and maintaining the correct conditions for the young plants. In the wild only a tiny proportion of seeds ever actually produce mature adult plants. For you and I, however, the opposite applies, because we can control the environment and act when necessary to support a seedling. Therefore most of the seedling you produce WILL go on to develop into mature plants.
For large-flowered hybrids, and some species plants also, plants generally take a year or two before flowers can be expected, but this is not the case for all clematis. Some species plants, for example C. serratifolia, C. tangutica and the like, develop rapidly and a seedling will fill a two litres pot with roots, and produce flowers, all during the very first season immediately following germination. Therefore it is prudent indeed to grow a range of plant-types; you can then have new and very beautiful flowers in your very first season, even while you are awaiting flowers from large-flowered hybrid seedlings and other species which take longer.
1. Overview, Reminders & General Points
2. Germination
3. Transplanting
4. Establishing
5. "Gardening" - pruning, feeding, watering, controlling, re-potting; day-to-day activities.
6. Summary
1. Overview Some photos still 'to follow'.
These notes apply to seedlings raised in my locale, the UK, and the details will vary, depending on your location. Seedlings can be kept indoors, in a suitable spot near a good source of daylight; or use a greenhouse. A greenhouse or similar is better, but not essential. You don't need a degree in Botany or complex equipment - no lights, heaters, apparatus etc. All you need is a bit of patience and care.
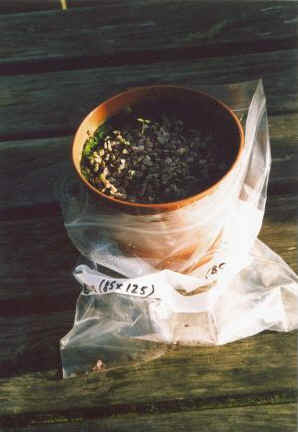
Storing pots; checking for germinations
Raising clematis from seed is no more difficult or easy than raising many other types of plants from seed.
If you are an experienced seed raiser then I doubt you'll have too many problems. If you are completely new to raising plants from seed, read the other pages first. Then you'll know the basics, and will have seen the photos of the results. Once you start raising plants you'll quickly teach yourself how to make it work. You'll better take in the information on this page if you have read the other main notes pages: Overview; Hybridise; Germination; Growth; Growth Gallery; Further notes on raising. Click on any of these links to go to the specific page; click your "back" button to come back here, or use the menus at the top of any page to navigate around. Some of the points touched on below are discussed more fully on those previous pages, so to get the full picture it will pay to see the other pages. None of it is either technical or scientific/complex.
Large-flowered Clematis do not come "true" from seed. Therefore every seedling raised will produce its own brand-new, never-before-seen flowers. They may, or may not, resemble the parent or parents to a greater or lesser degree. It depends on the specific genetic blueprint of the individual seed, as mentioned on an earlier page.
Species seeds produce plants which are largely similar to the parents, though there may be some relatively minor differences, depending on the variety, but largely they will be quite similar to the parents. They do come "true".
Having said that, if you plant seeds of, say, C. texensis, don't expect to get a perfect "texensis" from every seed every time. Many clematis are quite cross-fertile, that is, they sometimes interbreed with other clematis growing and flowering nearby. Pollen is carried from flower to flower by insects; therefore, for example, if you grow C. texensis and C. versicolor in the same garden, expect seed from such plants near to each other to sometimes produce hybrid plants, as well as "true" or "pure-bred" plants. In many cases you can't know in advance whether the species seed you are sowing is 100% true, unless you've very carefully checked with a good source, and been lucky, prior to acquiring it.
Therefore even with clematis species seeds it frequently happens that, despite what it says on the packet, hybrid plants sometimes arise. If you are particularly wanting a specific species it can be 'a bit of a bind' if you keep getting hybrids instead of a pure species specimen. But for the majority of amateur growers, such as you and I, it doesn't matter at all. The reason for this is that, by definition, hybrid plants are different, and therefore highly interesting and desirable in their own right, perhaps, sometimes, even more valuable, because if you are lucky you may well get flowers which are unlike anything previously seen and still quite, or even more, beautiful, and I can assure you, that will be a significant achievement and well worth the effort. Some of the most beautiful clematis cultivars and species variants in existence today have arisen from seed labeled as something else.
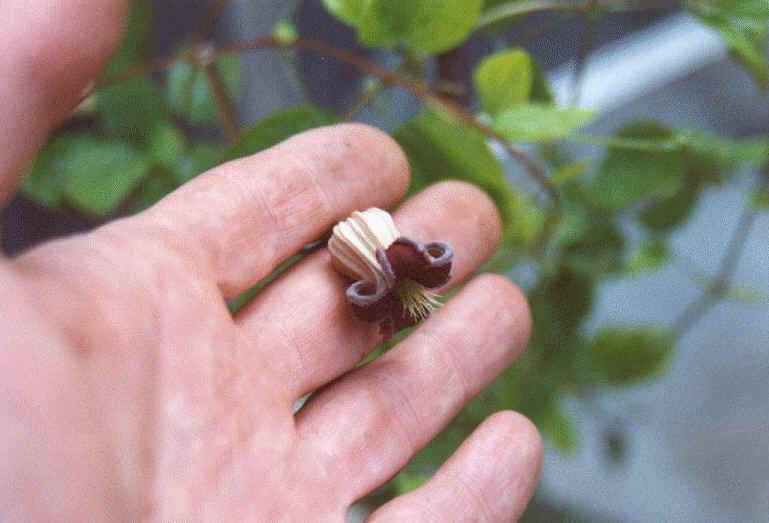
What a gem. It was supposed to have been "C. texensis" but who cares? It's beautiful (and unique) anyway.
Having once seen a new clematis plant produce its first flowers, most people will want to see more! The reason for this is, of course, that clematis produce very exciting and beautiful flowers, and you cannot know in advance, for large-flowered types and, sometimes, the species, just what the flowers will look like. There is always some magic in the anticipation of the opening of your own plants' first flowers, every time without fail!
2. Germination
Firstly, read the notes on the Germination page.
Normally about 10 or 12 seeds are sowed in each pot. As covered on the 'germination' page, some seeds germinate quickly and some take longer. There is also a table of germination data, which covers quite a range of clematis plant types, on the Germination page.
The very first thing to do when you notice a germination is to PUT A LABEL IN THE POT. You WILL need to label plants now and later. It can be a simple or detailed as you prefer! It's not so important if you are only going to try one or two seeds, you can write what you wish on the label, but if you intend growing a reasonable number of different seeds, devise yourself a simple system and stick to it.
(For example, you might bracket all seedlings which germinate during the current calendar year as the "A" series, ("A" = Year 2003) and, let's say, two seeds germinate in this first pot. Let's see: this first batch is series "A". This is the first pot where seeds have germinated, so it's pot 1. That is A1 so far. There are two unique seedlings, so they are seedlings a and b. So you can label these two seedlings A1a, and A1b.... The next week a different batch germinates in a different pot - pot 2: there are five this time - they become A2a, A2b, A2c, A2d, A2e. Then another pot produces just a couple of seedlings - they become A3a and A3b. You go on through the season, assigning a sequential number, each time germinations occur. Next year you might like to label any germinants the "B" series.
Having some kind of logical sequence gives you information about your plants even at a glance at the label, without having to look it up all the time. It doesn't matter how you do it, so long as you can keep some records so you can look back and see what plants they are, and if desirable, where the seed came from, the sowing date, and the germination date.
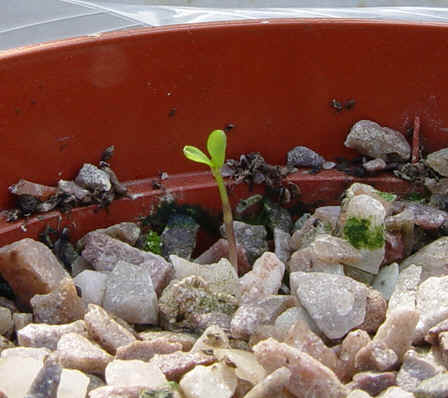
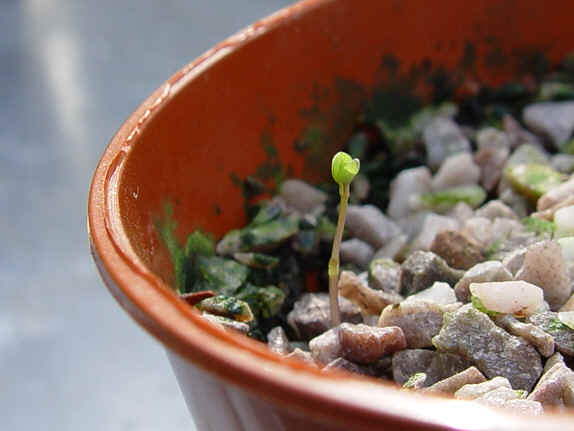
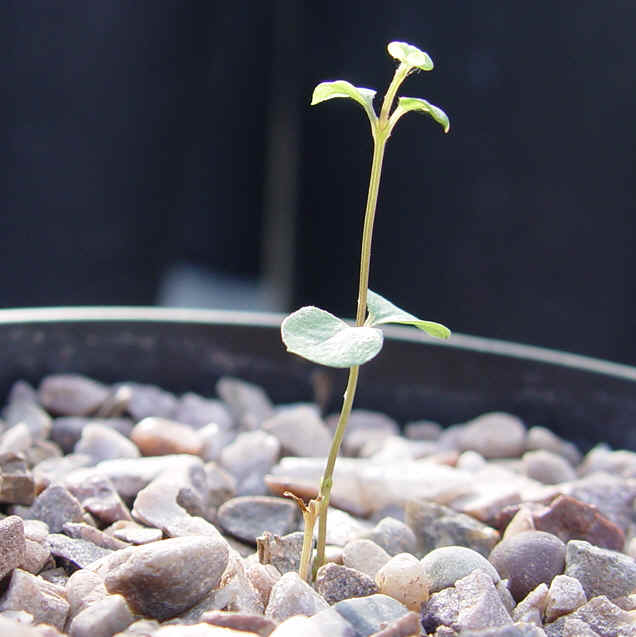
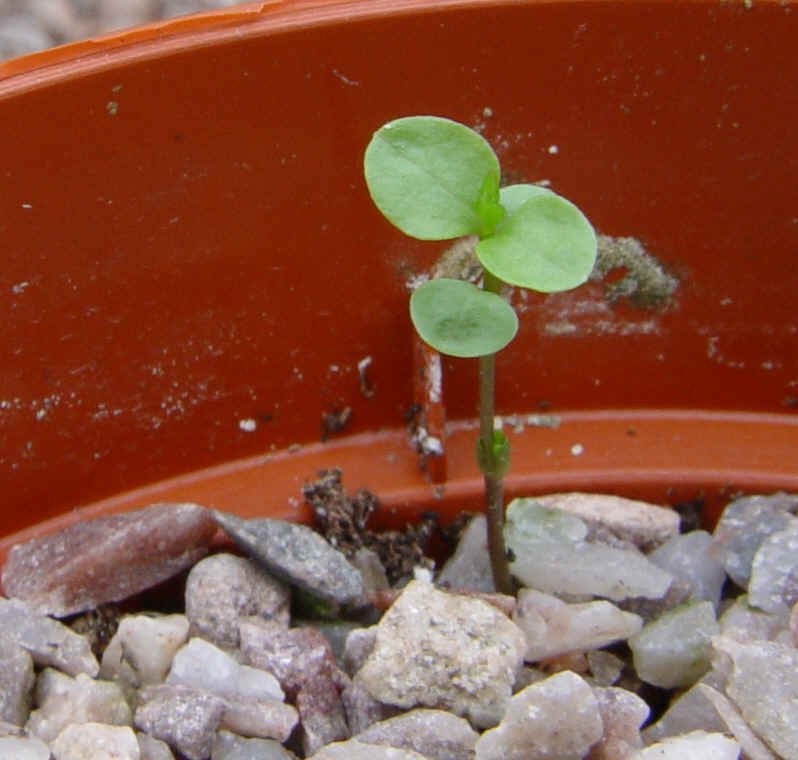
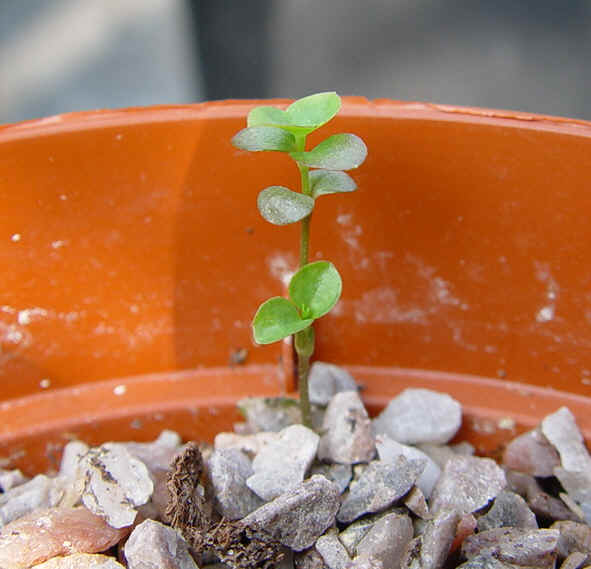
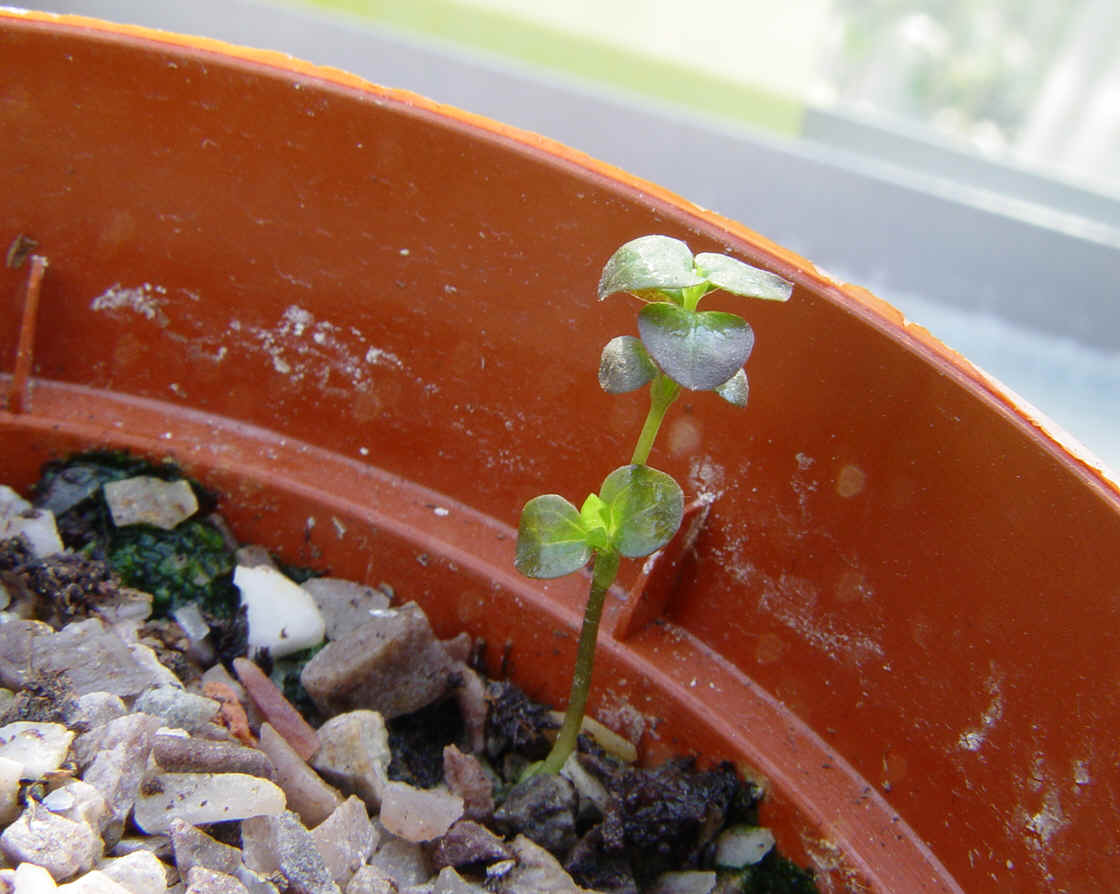
Two new large-flowered hybrid seedlings 2 days after emergence. (Emerged 14/2/03)
1 2
If your seeds happen to germinate after winter, the task is quite straightforward; because the plants will grow quickly in the warm temperatures and long daylight hours, and will develop quickly. Even those seedlings which germinate around August should be fine; they'll have the remainder of August, all September, and a few weeks in October, to get established to some degree, especially if they are being raised in a greenhouse. These seedlings should be nurtured carefully to try to get them as well-established as possible prior to the onset of Winter. They should survive through winter ok, because the root of the plant will have made at least some reasonable growth. In spring such seedlings usually produce a new shoot or shoots from the root, in mid-late January, or February, and then grow away strongly. By March they are growing well again and can be pruned further, to cause branching of the lower stems, and be re-potted again when necessary.
Any seedlings germinating at the beginning of, or during, Winter, are more of a challenge, because the tiny plant will first have to survive the Winter, prior to being able to make any real growth. See the notes on the germination page, under the heading "overwintering seedlings".
The main things to guard against are the actual degree of cold itself, and fungal infections encouraged by cold, over-wet conditions. Draughts compound the problems. Small seedlings will withstand some frost, there is no doubt, but very young seedlings, subjected to days on end of freezing, may succumb. So if the weather is cold but not too cold, or freezing, but only around 0 to -5, for short periods, don't worry, even if your seedlings are out in the greenhouse. These seedlings will have felt the cooler weather from outset; you might just want to arrange a little 'fleece' material around/over them in the short term (especially overnight) if you are worried.
However, if conditions really deteriorate, and very low temperatures are forecast, or if a good freeze continues for more than a couple of days, you'll want to fetch the seedlings into the house for a while, rather than trust they'll be ok. Either that, or arrange heating sufficient to reduce the frost levels, in the vicinity of the seedlings.
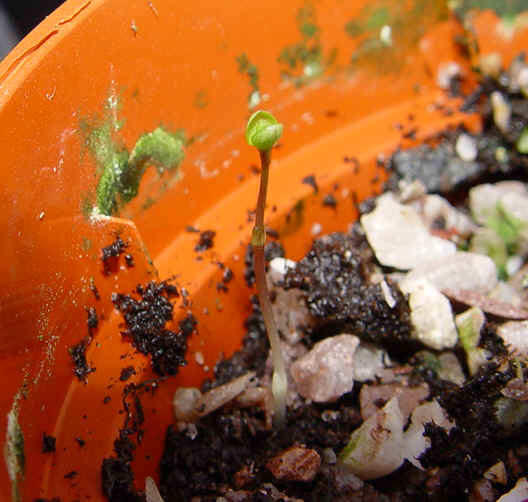
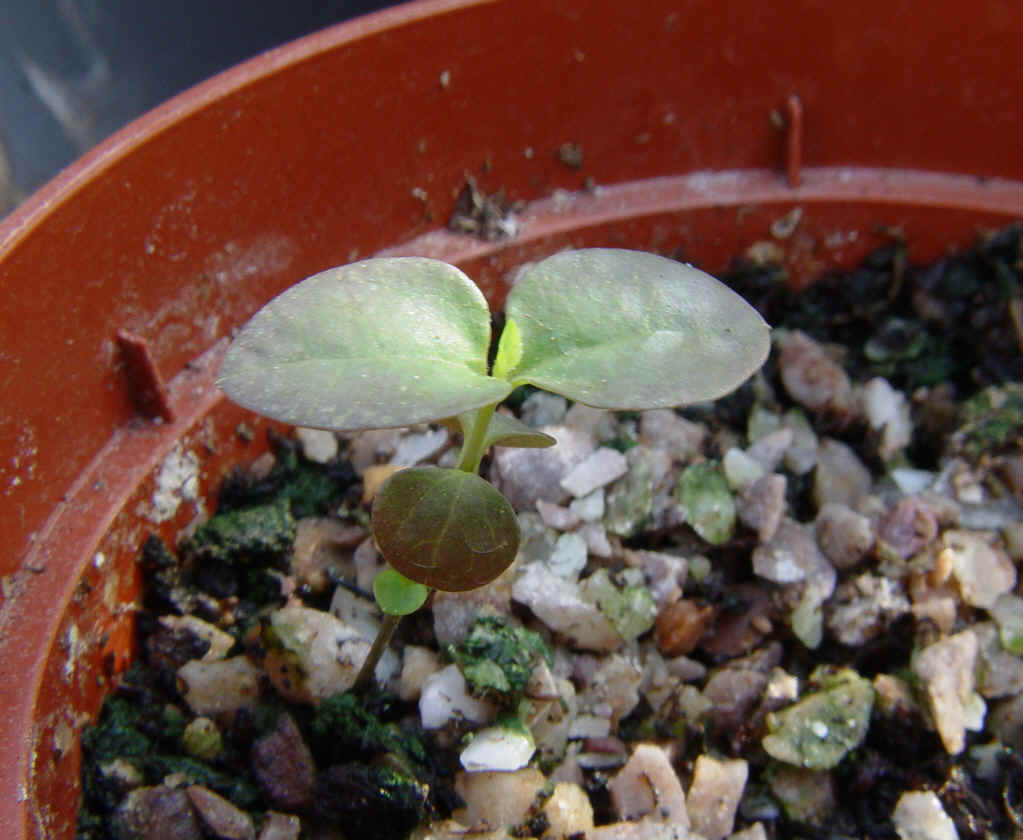
1 2
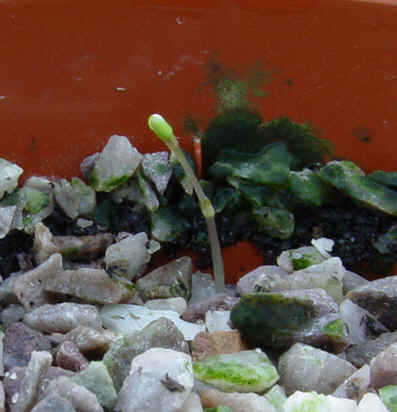
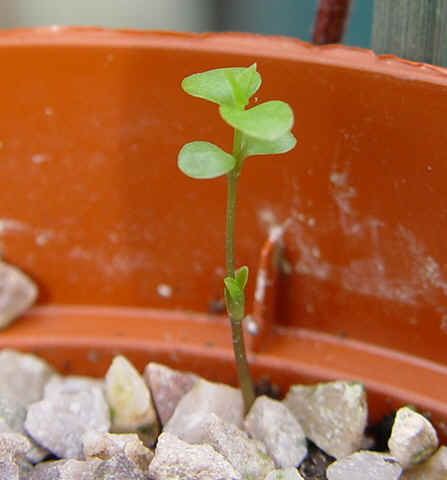
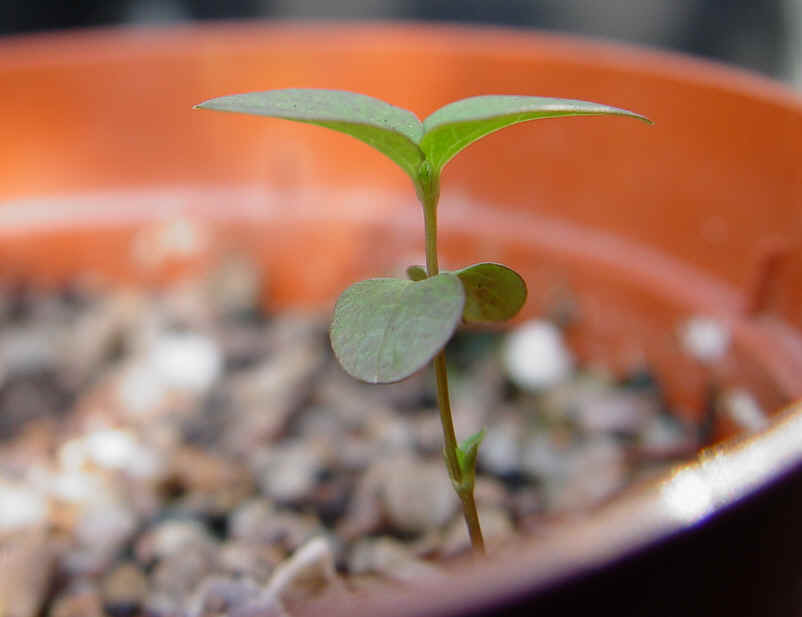
4 days after emergence; with gravel, and with gravel removed.
These seedlings will more or less "stand still", in the sense that the stem will not elongate much, not produce any number of new leaves or buds, until the days begin to lengthen again, and the temperatures rise somewhat. They may possibly continue on to produce a very small number of new leaves, slowly. Sometimes they appear to have died, only to develop another stem, after a few days. Sometimes they do maintain a leaf or two, especially lower down, however any foliage may ultimately die off during the winter, leaving just the residual stem poking up from the soil. As far as I can gauge the root continues to develop very slowly, but only slowly, during a brand-new germinant's first Winter.
Something that will kill seedlings without doubt is a hard frost when the seedlings are too wet or waterlogged. Thick ice around the flesh of a new germinant is just too much - the seedlings will take a modicum of frost, but not an ice-age.
If young seedlings are left in unhygienic conditions, or are subjected to overwatering, waterlogging, and especially, a combination of cold, draughts and damp, fungal infections can rapidly become a big problem. It's imperative, fundamental, to keep at least two forms of fungicide, systemic and contact, so that very dilute solutions can immediately be made up and dispensed, in the event problems arise. A line of defence against fungal problems is always a good idea.
Best to avoid it where possible by avoiding excess water stasis, or placing pots near cold draughts, or bad drainage; and by allowing air to circulate to some degree. Always water sparingly, and, as much as practicable, from the bottom. With luck and by dint of looking at your plants closely each day you can minimise troubles. But you might well from time-to-time check things and notice some fungal presence. Possibly it's inevitable. Therefore always have a treatment to hand, so that you can try to rescue the situation at the earliest possible time. Unless you catch a fungal infection early, the chances are the seedling may be killed. If you can apply a rapid treatment you at least have a chance of turning a 'lost' seedling into a 'saved'. It doesn't matter that a plant is set back somewhat, it'll make up the difference in no time, come the Spring. You don't have to resort to chemical fungicides; go with your own preferred methods, only do something, and if possible always have an alternative treatment, just in case the first one doesn't work.
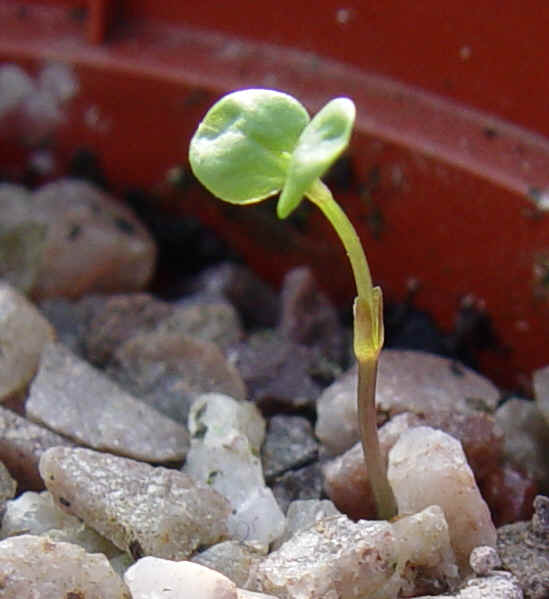
1 2
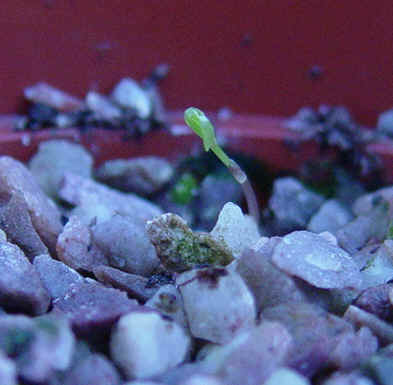
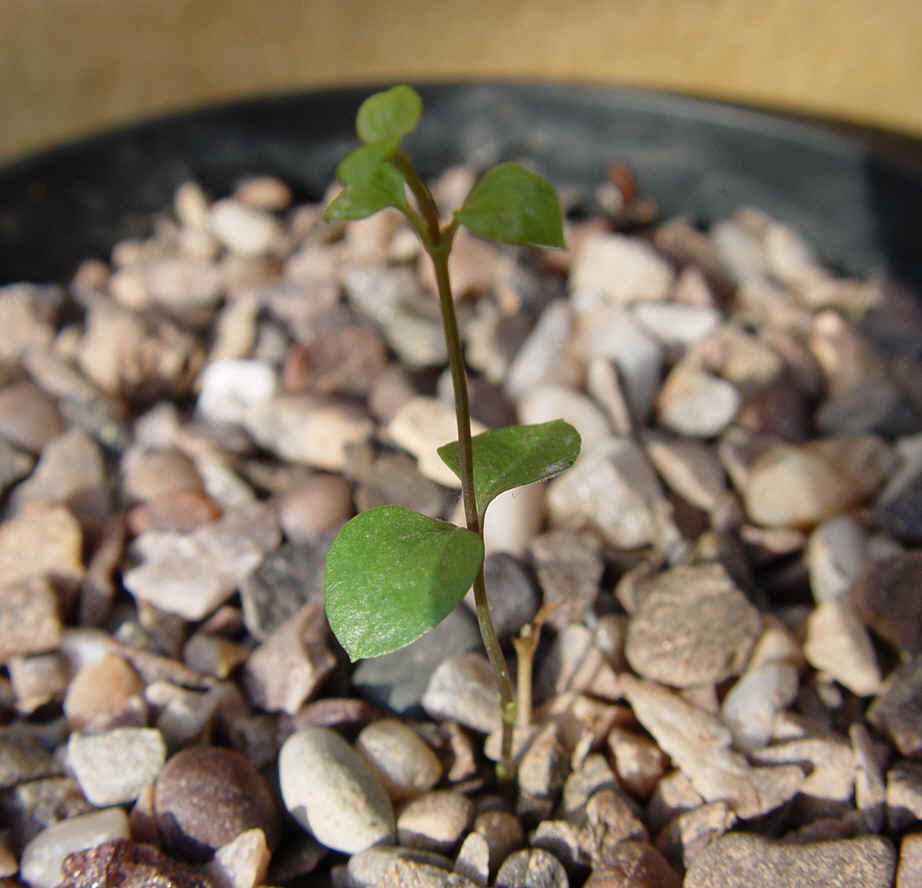
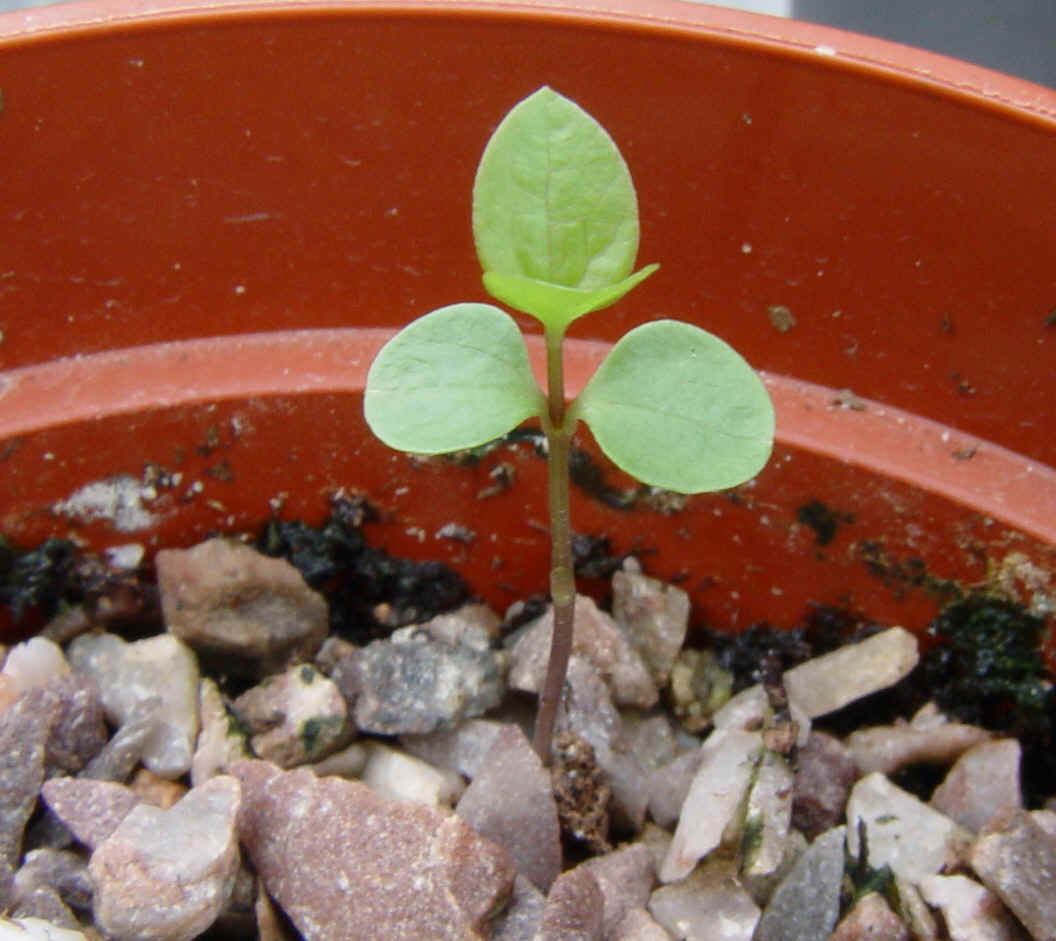
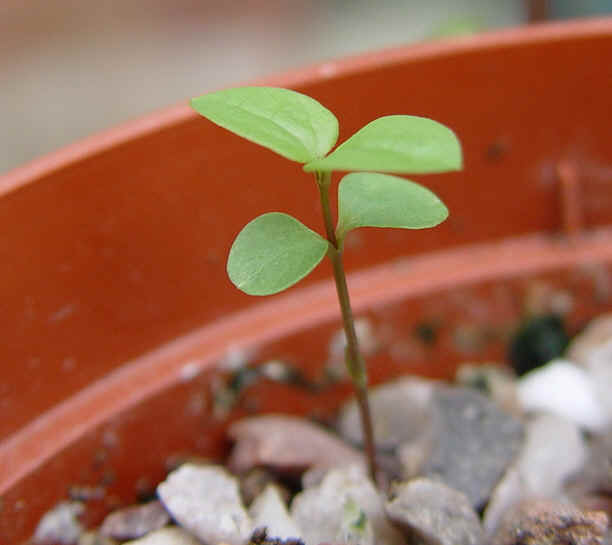
10 days after germination
So, for winter-germinated new seedlings, there is no absolute method, or guarantee of success, but you can significantly improve the chances of establishment by bearing the following points in mind: watch the temperatures; keep them where they can see the light; don't give any more water than is sufficient to keep the compost just moist, or even less; don't site seedlings in a draughty place; it's easy to see signs of fungal infection; always have some form of emergency fungicidal treatment to hand; be prepared to act rapidly in the event that any really freezing weather is experienced. Just do your best and by spring the plants will start to engage all their resources and move themselves on. By this point you've already got plants past the most uncertain period. It's still possible to lose one or two seedlings along the way, but that's life. However, most will struggle through for you and ultimately be none the worse, and on the day you get your first flowers you will look back and smile.
Here comes trouble: a slightly more advanced seedling: it looks fine at first glance but if you look closely you can see it is insect infested; worse still, a day later, a fungal infection can be seen just above the lowest leaves, on the stem.
After treatment, some of the foliage looks a bit the worse for wear, but the seedling seems to have resumed growth. Time will tell.
10 days after treatments, all seems fine now. Great!!
Seedlings develop dormant buds in the axils
Even smallish seedlings (seedlings with a couple of pairs of leaves or more) soon become equipped with dormant buds, at the junction of the leaf-stems with the main stem (the axil), on the initial stem; these miniscule dormant buds become much more visible, once the seedling really 'get's going'.
If you break a stem, it's not the end of the world, because it is highly likely that new shoots will be produced from these dormant buds.
All of the above boils down to helping the plant to establish the root. As long as the root can become established, the foliage above may then suffer trauma, or even die-off more than once, or be frozen in Winter, and the plant probably will still eventually recover. Not every time, but mostly. In this world, half a chance is a million times better than no chance. But where the root is killed, there can never be regeneration.
In practice, few of your seedlings will have real problems, and if any do, the buds on the stem will often save the day. Before too long, in fact, seedlings become able to re-shoot from the stem or from the root. Even during the early stages, this kind of seedling is provided with adequate means of 'starting over'.
3. Transplanting
Transplanting each seedling into its own individual pot gives it room to develop its root, a competition-free source of water and nutrient, and makes handling seedlings at all stages much more practical, easy and convenient. Also, any fungal or insect malaise will usually only affect the one seedling, instead of a full batch still growing together in the germination pot. Once in individual pots, seedlings can develop at their own rate and in their own time.
You've noticed some germinations during a routine check and you want to know how best to deal with them, from now on.
Sometimes a single seedling will emerge, sometimes, just as often, a batch all at once. Don't be in a hurry to transplant; rushing is not necessary; a plant needs to possess a sufficient root in order to become strong enough to cope with transplanting.
On first germinating, the seedling consists of a tiny root below the soil surface, supporting a short stem above, bearing a pair of seed-leaves, (sometimes this may actually be the second pair of leaves, as some clematis produce their first leaves under the soil surface - hypogeal germination - as opposed to the first set being above ground - epigeal germination). The biology of the mode of germination isn't critical. Your first visible knowledge of any germination will be to see two small leaves atop a stalk.
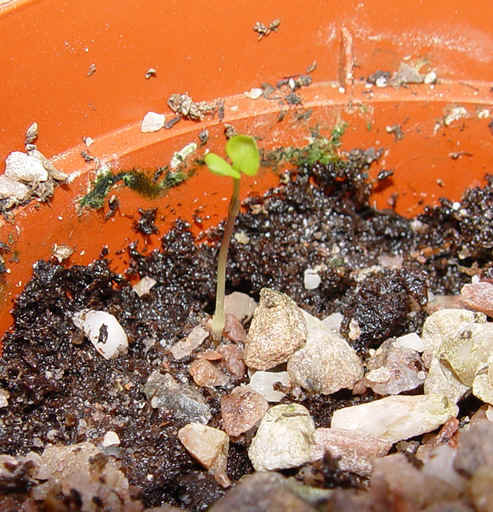
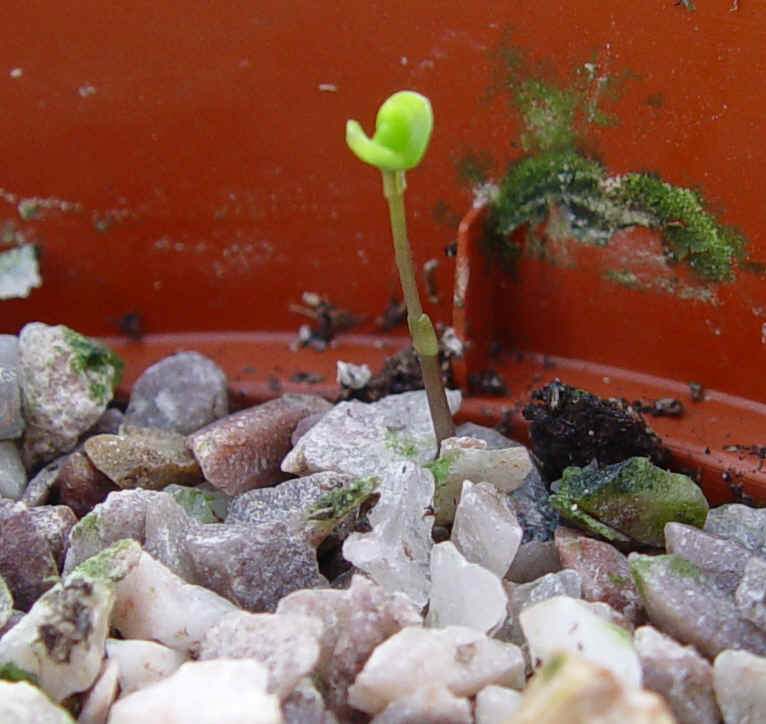
A tiny seedling appears
Once this occurs, immediately place the pot where the seedling can see the light, but never in direct, hot sun. Seedlings don't need intense light at this stage, just average diffuse light, to bring them on slowly and steadily. From now on the aim is to keep the growing medium just moist - not wet - and the one good way to achieve this is to stand the pot in a saucer, adding sufficient water to the saucer from time to time. You'll want to keep the medium just moist, to best favour the root - a root will not like having to grow into a hard, dry medium.
NEVER attempt to transplant seedlings this early after germination, because you will kill them 80% of the time. The tiny plants must be given time to put a root properly into the earth. They've got to get their feet properly into the ground. It's the same thing when you disturb cuttings. You get impatient and start tugging on your cuttings, to see if there is any root attachment yet, before root growth has properly gotten under way. Before you know it, you have pulled whatever root is present away from the medium. What was really needed was some days or weeks with no disturbance whatsoever, to permit proper establishment.
While the seedling is still very small and young, the root, though now able to bring in water and some nutrients, is gripping onto life in rather a precarious fashion. It consists of a downward-growing main artery from which one or two very small side-branches have started to develop. Not plainly visible to the naked eye, (that is, at a microscopic level) the root is in fact dotted with many small outgrowths, which ramify through the nearest particles of growing medium, allowing the tiny root maximum overall contact with the largest possible surface area of medium in its vicinity. The medium provides an anchorage for stability, and the plant can from it absorb water and dissolved nutrients. At this point, disturbing the root can be fatal, because it breaks the contact with the small particles of medium with which the miniscule root structure is in intimate contact. Getting the root to re-establish contact with new medium is not straightforward, and the result often is that the seedling dies. All that waiting, wasted for the sake of a little more patience!
Once the root has had time to progress a little, you will see that the plant begins to start producing new pairs of young leaves as the stalk elongates. This might be a week or two after germination, or more, depending on the temperature and other variables. By the time the plant has produced, say, five or six sets of tiny leaves, it's likely that sufficient root now exists to enable transplanting to take place. There is no rush, though. If it makes you feel more sure, leave the seedlings in the germination pot until they have six or seven or more pairs of leaves. Transplanting is a little bit of a shock, but done carefully the plant hardly notices, and continues growth without interruption. There's no need yet to prune any seedlings. But why transplant in the first place? Why not leave the seedlings together in the pot, until some time later when it is more convenient?
If you leave seedlings together for too long a time, say, a couple of months, the roots will grow together and intermingle, making it nigh-on impossible to extract the seedlings without damaging the individual roots. The other reason is that, if you try to transplant a single seedling, shortly after emergence, you may disturb, and may possibly kill, the seedlings coming behind, as a result of breaking their as-yet immature and intimate though tenuous contact with the medium. If you leave things a while, ALL the seedlings that have started to germinate will come through, as well as the very first one visible. When you do eventually transplant, you can deal with all the seedlings at once, safe in the knowledge that they will all remain viable, rather than fishing seedlings out piecemeal from a repeatedly-churned mass. Wait, after the very first germination, a reasonable time - two weeks, or three - to assess whether any further seedlings are coming behind the first one.
You don't need to worry about feeding at this stage. There is ample nutrient available from the medium in which the plant is growing. Leave supplementary feeding alone until needed, at a much later stage. The seedling, once it gets going, will in due course be potted-on a couple more times as it progresses. Each re-pot will provide ample new nutrients, and additional root-development space.
So, allow sufficient time for any seedlings to push through to the surface. Remember, sometimes a single seedling will emerge, sometimes, just as often, a batch all at once.
There is no need, yet, to prune the seedlings to any extent. There are no hard and fast rules, it's a case of judging the appearance of your seedlings. Err on the side of caution - don't be in a desperate rush to transplant or prune. Just allow them to grow, until about five or six inches high. I find that most seedlings are by then relatively stable, and substantial enough to be transplanted. Also, in the event that any accidental breakage (pruning!) occurs during transplanting, the slightly more developed seedling can more easily respond by straightway producing new stem growths from buds below the breakage point.
Most seedlings will survive well from this point and from now the root will develop and grow quite rapidly. As this occurs the seedling's water requirements will increase in tandem.
Practical steps.
Spread, on a flat surface, a sufficient piece of waste newspaper or similar, and have ready the correct number of new small pots. For their first transplant a three or four inches diameter pot is sufficient, no larger! Plastic or clay pots, or whatever, will suffice. In a decent-sized bucket mix together some medium for the pots: compost 40-45%, peat (or substitute) 45%, and 10-15% grit, gravel, very small stone material, whatever you want to call it. Get your primary tool - a pencil, a thin biro, a sharpened stick of wood; a 'dibber' of some sort, with which you can manipulate seedlings without touching them too much - ready.
Water the pots a little, a minute or two before handling. Take the pot containing the growing seedlings and carefully empty out any loose soil or other particles from the top, and of course any top-covering (I use grit in all pots prior to and after germination - one quarter of an inch). Place the fingers on the soil surface between the seedlings, and then invert the pot, carefully tapping the bottom of the pot so that the whole lump of medium (within which the seedlings are embedded) comes out into your hand all in one piece, then set gently down on the paper.
Depending on the consistency of the medium the whole will retain the shape of the pot, or it will break into two or more pieces, either way, carefully observe the seedlings, noting the length of any roots visible. Some will have reached the bottom of the pot, some not. Some will have grown down the side of the pot, some within the matrix. You will be able to see not only the obvious seedlings, but also, very often, other seeds in the actual process of germination, perhaps having put out a tiny root, the seed leaves not yet having reached the surface. If in doubt/not sure, leave the very tiniest germinants, which probably won't even have a proper root yet, in the soil, undisturbed. You will sometimes also see seeds as yet still ungerminated . Be very careful not to disturb what you do not need to disturb. Any seedlings not yet sufficiently developed can be carefully put back into the old pot, later.
Half-fill the new pots and have them ready nearby. Take your sharp pencil and gently tease each seedling free, one at a time, by poking around the seedlings, leaving any soil attached to the roots that happens to be attached. Don't spray them, to remove soil - you don't need to and it's possibly detrimental. You can handle the seedlings by very gently holding the seed leaves, or any low, older pair, of leaves, but don't touch the stem. Whatever you do don't pull seedlings out by yanking at the foliage -you won't have foliage or seedlings for long, if you do.
Tilt the new pot and contents to one side and gently pop the seedling onto the surface of the new medium, then carefully fill over the seedling root with dry, loose, fine medium, gently holding the lower leaves for control, righting the pot to the upright position as you do so. After a few tries you get the knack of holding the seedling such that when the new medium is added, the seedling is at the perfect height in the soil, that is, the base of the seedling about 3/4 inch away from the top of the pot, and right in the middle of the pot. Then firm the medium gently, adding more medium as you press, around the outside of the pot first, then towards the middle, with very light pressure. The seedling is now sitting in the middle of the new medium in its own pot at the correct 'planting height'. The appearance now is just as it was in the germination pot, with the seed leaves above ground at roughly the same height as before. Immediately LABEL THE SEEDLINGS!
You teach yourself how, by doing it. After a few tries you'll soon find your re-potted seedlings look neat and tidy, you can then 'top them off' with fine gravel; this helps prevent moss growth, retards any weeds, helps to distribute water evenly and to conserve the moist, gives some further physical stability to the plant, makes watering easier, and drying-out less likely, and affords a measure of temperature control for the tiny root.
When all of the batch have been repotted, line the pots up and water each to the point where water just begins to ooze from the bottom of the pot - carefully make sure all the medium is wetted thoroughly. It can be an idea to add a little fungicide to this water, but keep it a quite dilute at first - say one quarter to one half normal strength.
The seedlings can then be put somewhere out of direct sun - most important - to settle in.
Now go back to the germination pot you have just dealt with, and, if you did notice any further seeds in the process of germinating, deal with it as follows. Put the old germination pot down on the working-surface, and very carefully nudge, using your pencil, or a small knife, spoon, spatula etc the remaining soil back into the original pot, if possible keeping the soil levels similar to where they were before, that is, the layer with ungerminated seeds, and other seeds actually beginning to germinate, at the top. Sometimes it works out ok, sometimes not so well, but you can get most of the soil back where it was, with practice.
Make good the soil levels if necessary and firm gently, adding a new 1/4" layer of grit. Don't try to overdo it. You can only do your practical best. Then take the original label and add the letter "R" before or after the original label information, to denote "remainder". Water the pot. Then you can put the germination pot back with your other pots, and await any further germinations in due course. By labeling the pot "remainder" you can tell at a glance what sequence any seedlings that germinate later belong to, and in due course add them to the first batch of transplants, should you wish.
4. Establishing
Establishment is just the period between transplanting from the germination pot to the individual small pot, to the point in time where it is evident that the plant's root has a firm grip on the medium. From here on it can be reasonably safely assumed that the plant is definitely viable, and will have begun to grow on strongly.
Once seedlings are transplanted from the germination pot believe it or not you begin to "get to know them" and recognise them individually. It just happens. Once transplanted, the settling-down period, in good conditions, for any decent seedling is not more than 24 hours. Once that's past most seedlings will look healthy and fine. After that, establishment proper consists simply of maintaining good growing conditions for a week or two while the root expands into the new compost.
By means of frequent observation you will notice differences in individual growth rates, colours, how healthy they look, etc. Some will come on faster than others, with new leaves unfolding every few days or so. Others require a pause, a phase of consolidation; before resuming growth. The fact is, healthy seedlings, with good sunlight, just ample water, nutrients, the right size pot, and time, will establish themselves quickly and with few if any problems.
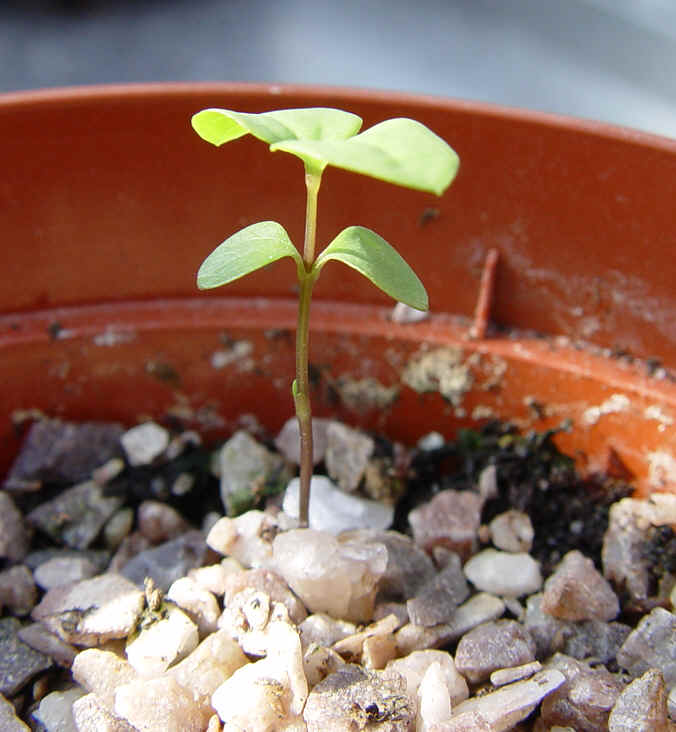
19 days after emergence
As per the above notes, seedlings germinating just prior to the onset of a cold winter are the ones requiring most attention. With care, though, you will get these seedlings through to spring mostly without incident.
Once spring arrives the likelihood of losing any of these young plants is low. The same applies to seedlings which actually germinate during early spring; born into longer days and warmer temperatures, the seedlings will soon establish a strong root, and problems should only devolve down to 1. possible occasional fungal problems and 2. occasional insect problems. If you do enough to guard against these two specifics you will soon have seedlings on their way to their first flowers.
Once seedlings are transplanted you need to do two things: 1. Observe them for problems and 2. Water them in small amounts each day or two, so as to "nanny" them over the first few weeks. There are no complexities to worry about. The plant will do everything itself so long as it has light, moisture, nutrients, air. The medium in the pot supplies all of a seedling's needs except water. Do water in small amounts, frequently. Daily watering is easiest and best. You do not need to have the compost saturated. Your aim is to keep it 'just moist'. From time to time you can sit the small pots in a saucer of water, allowing the compost to draw water up into the soil. This way, the medium gets an occasional complete soaking, which encourages the root to ramify into all of the available soil.
If any fungal problems arise, check the conditions, and, firstly, eliminate any general causes of trouble - remember, airflow is necessary, but not cold draughts, no stasis of cold and wet, no waterlogged conditions, no infected plants or old accumulated plant material - detritus - in the vicinity. Use very dilute solutions of fungicide. For tiny seedlings, at first DOUBLE whatever dilution factor is suggested on the packet. Keep an alternative fungicide, to use 24 or 48 hours after the first, if absolutely necessary. Use it if necessary but at the minimum level necessary. Providing good conditions is fundamental to AVOIDING problems.
If insects are a problem, how much of a problem? You can't stop every greenfly or blackfly or whitefly. But they should NEVER be allowed to overwhelm young plants. If need be, skim insects from stems and leaves with your thumb and forefinger. If necessary, spray them with a water spray to remove gross insect amounts first, then remove any remainder by hand, before spraying with a DILUTE insecticide.
Such things shouldn't be too much of a problem because you are inspecting new seedlings every day or two without fail. Therefore you will spot any problems early, and deal with them immediately.
Before too long the seedlings will look fine in their individual pots and you will see that they are making steady progress, growing and producing new leaves.
5. 'Gardening' your seedlings
"Gardening" is the time period between establishing after transplanting, onwards to the point that the plants develop from tiny seedlings into true plants. This will occur during the first full season after germination. Occasionally it may straddle a winter, depending on the germination dates of the seeds.
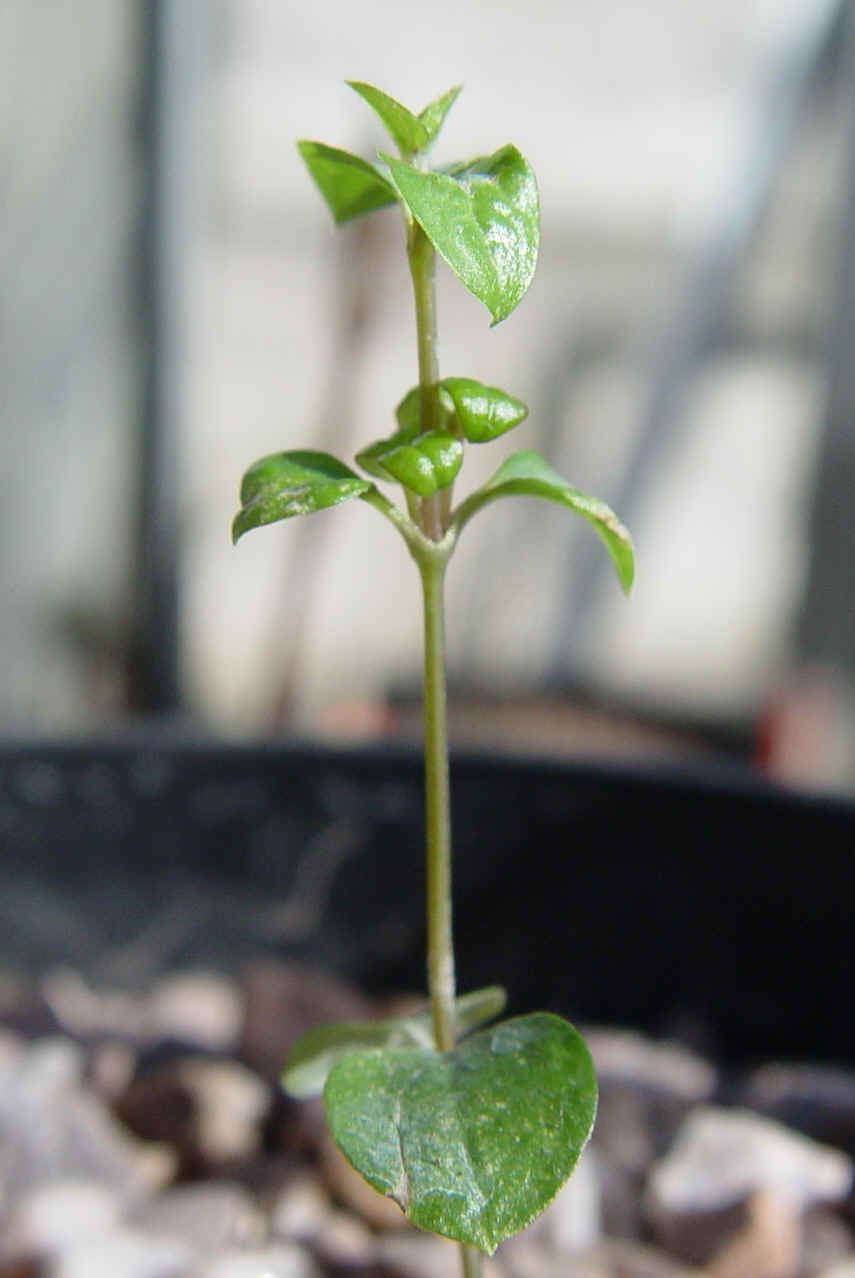
25 days after emergence
With most clematis plants, large-flowered and species alike, you can adopt exactly the same procedures without any need to differentiate. In the early days, all seedlings produce one main shoot, which develops leaves in pairs along the stalk, every 1/4 to 1/2 to 1 inch or so, depending on the rate of growth and the age.
'Gardening' consists of watching, watering, staking when required, pruning if required, feeding (occasionally only), and re-potting as and when the need arises; it sounds a lot to do, but these tasks arise in sequence, not all at once; they are easy and straightforward, and won't tax you too much at all.
At transplanting, the seedlings have reached the point where they possess five, six or seven or so sets of leaves. Assuming spring or summer germination, this phase will have been reached within about 8 weeks, at the maximum. (In winter this will not be the case. As mentioned above, the seedlings may stand still for a while, immediately after germination, and will not produce much new growth because the temperature is still too low, and in any case the plant tends to await the onset of longer days in spring, prior to becoming very active).
After transplanting, the plants will take a day or two to settle, after which you should then allow them about one week to really feel at home in their new pots.

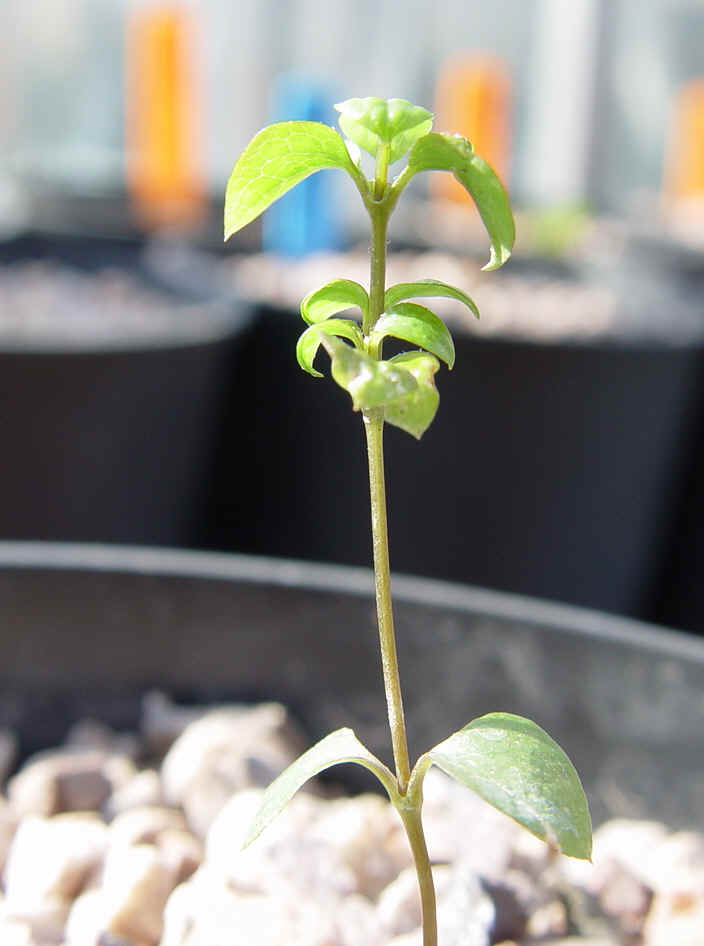
30 days after emergence
These seedlings may look quite frail, but clematis are the masters of disguise, and in fact are very tough, and really do belie their fragile appearance.
40 days after emergence
It does happen that plants can suffer traumas from time to time, for example, if you drop a pot the main stem may break, or you may physically damage a plant by accident while inspecting, staking, etc. Don't worry - it is very likely that the plant will shoot again from either the root, or buds located at the base of the stem, or both.
60 days after emergence
There is no point leaving the seedlings to grow on just one stem. If they are left alone, without being pruned, the primary vine will continue extending, and will soon reach 6 - 12" in height. Once the seedling is above 4"- 6" in height you will need to insert a thin stake into the pot, utilising small pieces of plastic-covered plant-ties material, to attach to the stake. In the very early days, try using thin wooden cocktail sticks as stakes. You'll replace them later, with better, 18" stakes, when the plant is a little further on, but at the very outset they are quite suitable for the purpose. Ultimately such early stems will thicken and mature somewhat, becoming darker and more rigid, and are quite practical to handle and look after. The lower leaves may well deteriorate, and fall away; certainly the very first (seed) leaves, or couple of pairs of leaves will usually wither.
However, you really want more than just one single vine. Once seedlings are about 6" in height, take a pair of sharp scissors, and, gathering your nerve, prune the plants above the third or fourth set of leaves, reducing back down to about 2 or 3 inches in height. I know this sounds like a frightening procedure for such tiny plants, but you will be surprised: these weak-looking seedlings will click into automatic mode, and the buds below the pruning point will become activated, and, within a week or so, the lower buds will begin to extend, producing one or two (two, usually) new vines, which you can carefully attach to the stake, as they extend, once again using plastic-covered ties.
When this happens you will be relieved that the plants are indeed much tougher than they look! Sometimes, a plant at this age may suffer a fungal infection, or a physical breakage, but, I can assure you, nevertheless the plants will always do their best to survive, and even in quite severe cases of damage, the plants will produce new shoots, as long as viable buds exist.
You have to bear in mind that, in nature, there are NO special favours granted to random seedlings. Most newly-germinated seedlings are subject to the rigours and hardships of real life, bad weather conditions, the effects of animals, any number of other problems, and yet many still manage to get through to maturity. Yes, the plants are subject to setbacks, and some may be lost along the way, but, because life is tough, and the seedlings are well aware of it, the plants have adaptions and mechanisms for survival, and will not give in except under dire circumstances.
So do not be afraid of pruning; the seedlings, even at an early stage, are tough, and will simply pause, before coming back strongly, producing new vines from buds lower down on the stem. (Every leaf/stem junction (a "node") houses two dormant growth buds; if after pruning you have left two or three of four nodes, the plant has plenty of resources to allow it to re-grow).
The purposes of pruning seedlings this early are to deliberately cause the plants to produce new stems, and also to make handling the young plants easier - you don't really want to be dealing with a single tortuously thin vine about two feet in length - it's just not practical and should be avoided. It is no problem for the seedling to support several vines as opposed to a single vine. During the pause after pruning, the plant will concentrate on developing the root. Root development being fast, the young plants soon come back strongly with new shoots, and in a couple of weeks you'll find that you're dealing with a multi-stemmed plant instead of a single-stemmed plant.
Once the seedlings resume growth after pruning, allow them to make further vine growths (from buds below) of about 6 inches in length (this will take a couple, maybe three or four, weeks in good weather), and then prune the new growths, to about half their length. Don't beat about the bush, prune each vine just above a node, and maintain the compost 'just moist'. Once again, buds will break to produce new vines, from lower down. Tie these new growths in, very lightly, to the stake, once elongation is sufficient.
By the time you have pruned twice or three times, the lower vines will definitely be looking more rigid and darker in colour. Inspect the bottom of the pot, (you can even invert the pot and tap the entire contents out, to have a better look), and you will see the developing roots; by now they are sometimes beginning to grow out from the base of the pot, through the drainage holes.
You have now enabled the tiny seedling to establish in the new pot, and then pruned the plant once or twice, and now the root is developing rapidly. Once the root has filled the small pot, or is close to it, it is time to re-pot from the small 3 or 4" pot into the next size up.
This time, though, plant the seedling slightly deeper, so that the first couple of inches of vine, or vines, is below the soil surface. It is not an exact science, and there is no specific "correct" way, so just be confident and do it. Again, this is just a means to give the plant a better chance in the longer term - the lower vines will almost certainly root into the medium, producing a stronger plant, fresh shoots from the soil, a healthier root overall, and, ultimately, a better-established seedling which should survive most traumas.
It is not absolutely necessary, but you can give the plants at this stage a modicum of weak liquid feed, on re-potting. More or less any general feed is ok, powder or liquid-dilute - it doesn't really matter - it is only an additional supplement. The medium in the pot will provide 99% of what is needed.
As the vines grow, attach loosely to the stake(s). After re-potting two or so times the young plants will by now be in half litre (4 inch) or 1 litre (or equivalent) pots. You will reach a stage where it is appropriate to use 18" stakes; insert right down to the bottom of the pot, and tie the plant in. The growing plants will by now be keen to wrap onto the stake and extend onwards as fast as they can.
From now on it is simply a question of nursing the seedlings through the season, attending to their needs in terms of water, good aeration, staking and tieing in, occasional feeding, and correction of any sporadic problems if any occur.
You have now reached the point where most of the likely problems have been dealt with, and the plant is almost certain to survive well, and produce first flowers sometime in the next season.
6. Summary
You have watched the seeds germinate to produce tiny seedlings; allowed them to develop sufficiently to enable them to survive transplantation into their own individual pots; allowed them to establish in the new pot; you then pruned a few times, to develop the root and plant, and keep it easy to handle; stabilised the growth by inserting stakes, and tieing growths onto the stake/s; maybe gave an occasional (only) liquid feed; and re-potted from time to time to give the young plant ample fresh nutrient and space as the root developed; and kept an eye out all the time for problems.
The first season draws to a close; the likelihood of producing flowers, either early next spring, or during summer, is high.
Overwintering plants at this stage is easy. The plants are now well established and will come back from the root next year without any fuss at all.
The plants and foliage will usually appear fine during October, but will definitely begin to fade toward the end of the month. By the end of the first two weeks of November many, or most, leaves, are by now fallen or dead, and the vines are dark, and hard. After three weeks of November nearly all foliage is dead, any remaining, looking decidedly the worse for wear. However, even by now, fat green buds are present in the axils of the dead-looking vines. Some of these buds will survive Winter, and produce flowers early in the next season; some will produce longer-growing vines which will bear flowers in their turn. Even if all these vines and attendant buds are pruned away now, the plants will still flower early next season on vines produced anew, in February and March, from the root 'crown', just below the soil surface.
Await mid-winter, (between Christmas and New Year is a good time) and take the opportunity to pot-up, to the next larger-size pot, all those seedlings which will benefit from fresh medium (most of them!)
You have now succeeded in getting plants from germination to the point where you can expect first flowers, next time around.
You can now continue with the plants, referring to the details given on the other pages around the site - here they are - click to go to the specific page:
Growth page Growth Gallery page Further notes on seedling growth