Development and Growth of Clematis Plants from Seed
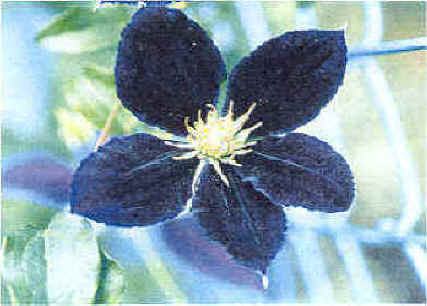
Clematis 'Black Tea' bred by Mr Hayakawa in Japan and introduced by Mr Yokiashi Aihara
Overview
Clematis seedlings at various stages from germination through to flowering. Although there are some photos in this section, most are over on the Growth Gallery page, hopefully that makes it easier to follow the sequence of events!
***
Many images are "thumbnails" - click on the small image to enlarge, click your "back" button to return.
1. Large-flowered hybrid seed (LFH)
Stage 1: Germination
For data on some seed germinations, and how things might go, see the Table of Germinations Data on the Germination page.
All of the following pertains to my location in North-West England. You may be near or far; your local conditions will differ from mine to some greater or lesser degree!)
***
Obviously I'm no Botanist or horticultural expert, but I have found that: Germination, for average LFH seed, is usually irregular, and can take a little while. Once your seeds are in germination pots, there is effectively little to do but to wait.
Of course, you should undertake to make certain that conditions remain favourable for germination throughout - attending to moisture levels; watching for any signs of fungus; removing weeds, insects, and so on. You do this each time you check for germinations; it won't involve a lot of work because, by and large, the polythene bags (within which seed pots may be enclosed) keep the environment pretty much how you'll want it, but occasional remedial work may be necessary.
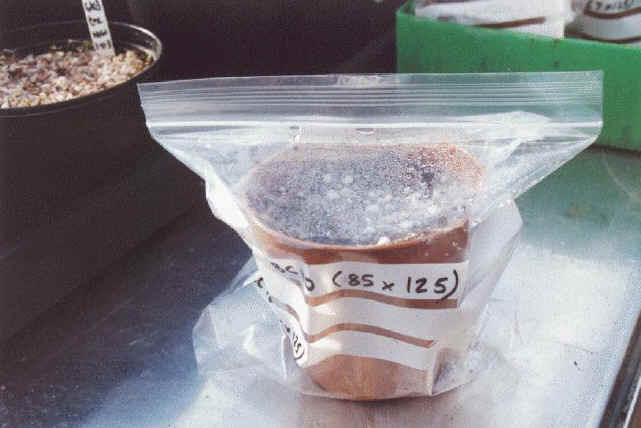
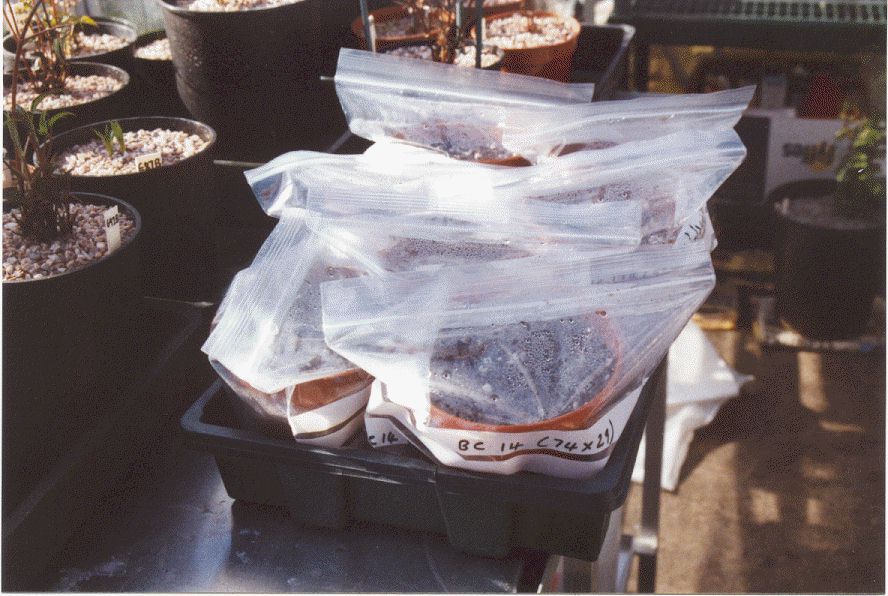
Pots fit perfectly Pots stored in trays
You want to sow several seeds, maybe up to about twelve, per 4" pot; cover the seeds to 1/2" with medium; top with fine gravel. Apply a good wet of weak fungicide; make sure all the soil is moist, allow to drain for a few minutes; enclose in a top-sealing plastic bag. The ones I use accommodate the pot exactly, (photo above) and, when sealed, retain just the right level of moisture over a long period; they don't go misty during storage. Pots should be stored in trays, this makes handling them easy, about 6 or 7 pots per tray works ok. You don't have to use polybags; the seeds will germinate just as well without; but I find polybags maintain a stable environment as required, over long periods, and therefore make storage, handling, and checking very convenient with less ongoing labour. Do ensure that direct sunlight cannot "cook" the contents!
Write, using an indelible marker pen, (prior to insertion of pot!) on the outside of the bag the seed type, date of sowing, source. For insurance I sometimes put a label inside the bag, again written using indelible marker. In most cases this isn't absolutely necessary - you might choose to do it only with particularly important seeds, especially if you think they may take a good while to germinate: n.b. some "indelible" markers can fade with time or moisture exposure. Occasionally I've had instances where outside labelling has worn off - rarely though - and it can be a bit of a process (!) trying to read almost non-existent faded scribble. I know this is all commonsense stuff, once you've done it...I'm just trying to help you avoid the need to re-invent the wheel.
You'll only need to check, at first, once per week. After some time has elapsed, you might think that nothing will ever appear, but suddenly, out of the blue, you'll notice sprouts, and you can then observe the emergence of the seedlings. Immediately rescue the pot from wherever it is stored, and place in the light - though not direct sunlight. Open the bag (if one used) to allow air to circulate. Water sparsely but don't allow to dry out absolutley.
Refer also to the LFH page for additional notes on how to treat seedlings from this point.
You should be able, after a bit of practice, to attain high germination success rates. I don't think there's any special knack, save persistence. The only difference with clems is TIME. As long as you maintain the right conditions, you'll succeed in due course. Don't give up. Once the first batch come through, you'll have successive germinations, assuming successive sowings. Remember, the time's going to pass anyway. So get your preparation and sowings done straight away, the sooner they are in, the sooner you'll have seedlings, then flowers.
Stage 2: Seedling stage
Having emerged, seedlings will seek light, nourishment, moisture and warmth; given good conditions, the seedlings will develop quickly, producing long vines, which can either be retained, or pruned, depending on the objective. It's prudent to do some initial pruning but if you want to get the first flowers as soon as possible, vines can be retained, tied onto stakes, in the pot; if this process is begun early in the season, it is possible to achieve flowers before the end of the same season, (though you may still have to wait until next year, depending on the characteristics of each particular seedling).
Earlyish season
However, it is prudent to try to achieve a stronger plant by pruning the seedlings down, whereupon the plant will be caused to 'break' at the nodes (the points where the leaf stalks meet the stem - the junction of each leaf stalk and the main stem being the 'axil'.). In nature, the plant knows it may well encounter set-backs; it may become damaged by pests, animals, the weather etc. Therefore a mechanism is necessary to improve the likelihood that the plant can reach maturity, the plant does this by reserving buds, at each axil, which can be called upon, should the main stem-bud growing point become damaged, or destroyed. See the Growth Gallery.
Wait until the seedlings have four or five good pairs of leaves. When the plants are very young the axil buds are nigh-on invisible, but once the main stem is pruned, these buds develop rapidly, and begin to enlarge, then elongate, in order to take over from the missing main stem. In this way you can deliberately increase the number of stems, low down, which gives an overall stronger plant, a better root system; a plant less likely to succumb in the future. So even if you want early flowers, it is still wise to prune initially at least, just to ensure a greater likelihood of survival, that is, to achieve a stronger, multi-stemmed plant.

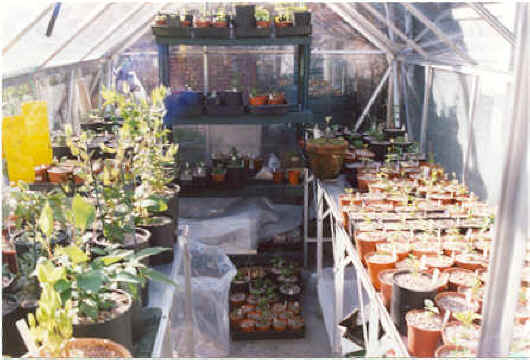
Things can get crowded! When you get to this stage the answer is...another greenhouse!
Once the seedling is up and running, you can decide to what extent you wish to prune, depending on space available, time of year, your time-table; matters of convenience.
You might be worried that cutting the main stem of a seedling could do harm. But it won't, usually, because clematis seedlings are very tough; and belie their fragile appearance. They will pause for a while, and then the top growth will come again, with renewed vigour; and you will come to wonder what all the worry was about. In the meantime the root will develop rapidly, and before long you will see roots emerging from the base of the pot, as they seek more space, nutrients, and moisture. There's some photos of some young plants' roots, following the next few paragraphs.
Overwintering Seedlings in the Greenhouse
Your chief concern are seeds which actually germinate during a very cold spell. It can be useful to have sufficient heat available to warm things for a shortish spell. Or you might choose to selectively bring new germinants indoors awhile, to tide them over the harshest conditions. Having said that, even newly-emerged seedlings have, on occasion chez moi been surprised by sudden cold, and have been frozen, but, on thawing, have nevertheless produced a new shoot, or just resumed growth. Clematis seedlings, generally, are very tough. You won't lose too many to cold, as long as they are in the greenhouse, at least. But it is prudent to perhaps pamper your most prized germinations for a while if the cold persists, just in case.
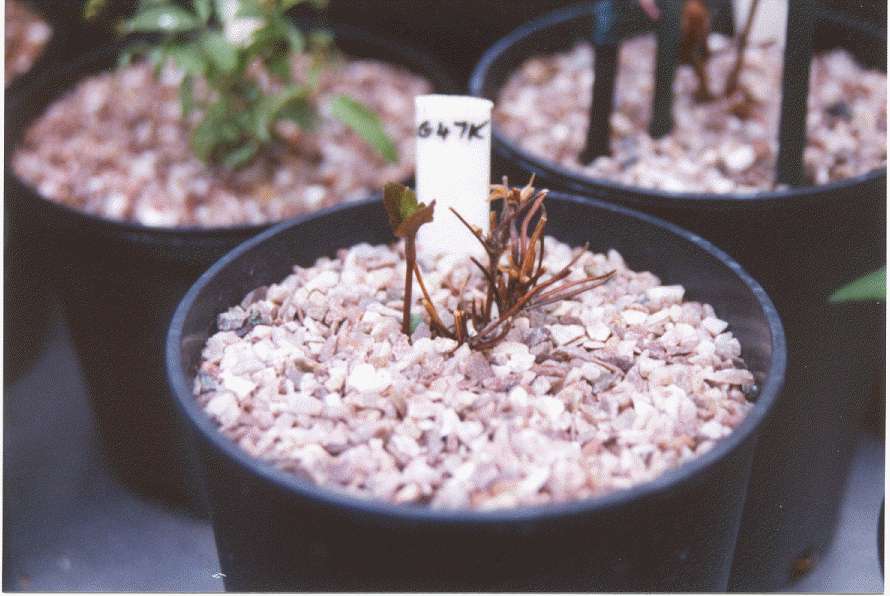 I thought it was
dead, but...
I thought it was
dead, but...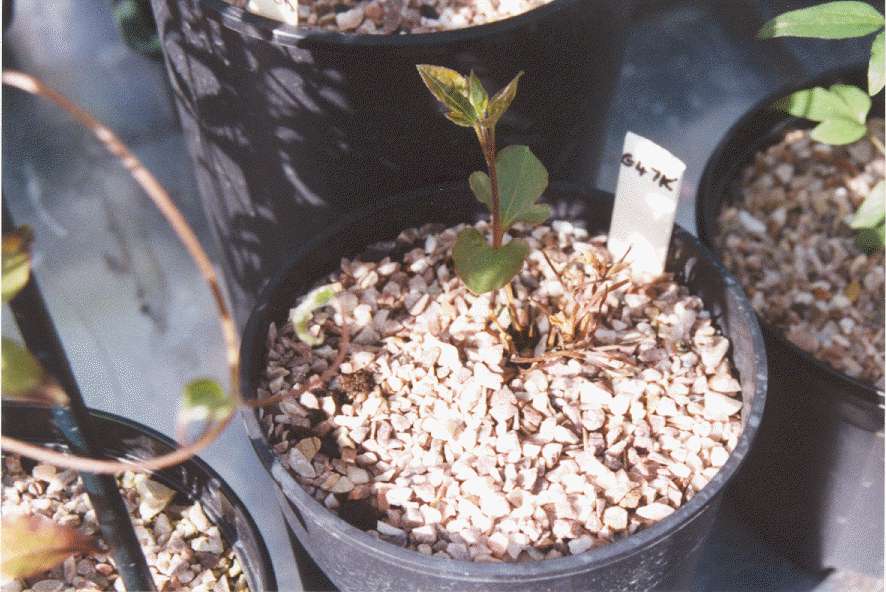 ...she was just
being shy. Seedling G47K decides to re-emerge a couple of months after its
fellow-germinants. Clematis seedlings show great resilience.
...she was just
being shy. Seedling G47K decides to re-emerge a couple of months after its
fellow-germinants. Clematis seedlings show great resilience.
I am referring to conditions in Manchester, UK, where our coldest spells (I shouldn't say this) are usually relatively short in duration. Once seedlings develop the beginnings of a root system they are already usually able to withstand some reasonable frost, to a significant degree. Any seedlings potted earlier in the season, which have established to some extent, will usually be fine; the foliage on these seedlings will die down and rot. The vines may persist and often carry live buds in the axils (between the leaf-stalk and the stem). If the foliage is going to rot anyway it is best to remove it by pruning even young plants down quite severely. Don't worry; even young plants will surprise you with large-sized shoots or buds in due course.
The re-growth of the plants during and after winter is dependent on temperature to a significant degree. In the UK we seem to be having milder and milder Winter conditions on average; at present in my greenhouses (December 25th - 30th, 2000) most of my seedlings from the last batch of germinations, though still young, have this year already produced early new buds in anticipation of resuming vigorous growth! See the Growth Gallery.
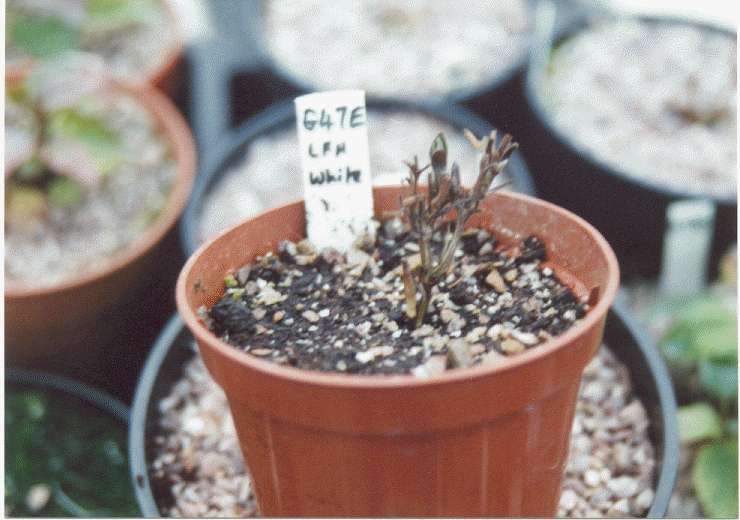
Photographed during the cold spell between Christmas and New Year, this LFH seedling has already produced a new shoot from the base. The fine gravel on top has been removed, so the shoot can be seen more easily. At the time of taking the photo all my seed-pots, seedling-pots and plant-pots were frozen solid. We had four days of continuous freeze, after which everything thawed out, but the seedlings came through fine. (Stop press: we had another freeze period recently, in February-March; all pots frozen once again for several days, but fortunately no calamities or seedlings lost!) The seedling below germinated 12 months ago. By now, the root system is quite well developed:

Between Christmas and New Year is a favourite time to catch-up in the greenhouse. Wrap up well and get at it! You can re-pot all newly germinated seedlings (within last six months to a year) into the next larger size pot; (having just undertaken this task yesterday, (28th December 2000), it can be reported that all of my pots, seedlings, seed-pots and plants are now frozen hard, due to the recent cold spell and heavy snow. I continued to re-pot anyway; time is short! I got fifty or so finished, and having checked them again 24 hours later can now report that the old frozen root-ball is now well and truly re-frozen within the new soil; the weather forecast is further snow and continued freezing, with even lower temperatures. If things go on like this for much longer I may spring into sudden frenetic activity and bring some plants into the cellar for a while!)
You can now make decisions on how much space you will require for next year, and therefore, what space you need to create, or re-order. You can decide which older plants must make way for the new - no-one can amass plants forever ! (there are exceptions!). Have a pre-Spring clear-out. This year many friends will be receiving gifts of plants in early Spring (with cultivation notes of course!).
Bring your lists and records, and/or spreadsheets and databases up to date.
***
Incidentally, in an overall sense, you need to keep tabs on:
Photos - plant number and date - keep sequentially ordered
Germinations - give all a sequential number, as soon as you spot them or as soon as possible after.
Hybridisations - as per records on Hybridisation page
Plant collection generally; number all plants as you acquire them. Keep a separate list, updated. You must keep records of where they are planted! If a plant gets promoted from a "germination" to a mature plant proper, because you decide it's one to keep, just apply the next seqential number, with the germination number in brackets imediately after - for example, seedling G37D, (the fourth numbered seedling of the 37th batch of seeds of series "G", to germinate) in due course becomes re-classified to Plant number 197 ;
Plant 195 C. delavayii
Plant 196 C. addisonii (Hamilton-Denny)
Plant 197 (G37D) New Pink LFH #7 or whatever
Plant 198 C. LFH "Vostok"
etc
Doing it that way you never lose sight of where a plant came from and when. You can refer backwards to your germination lists details with ease.
***
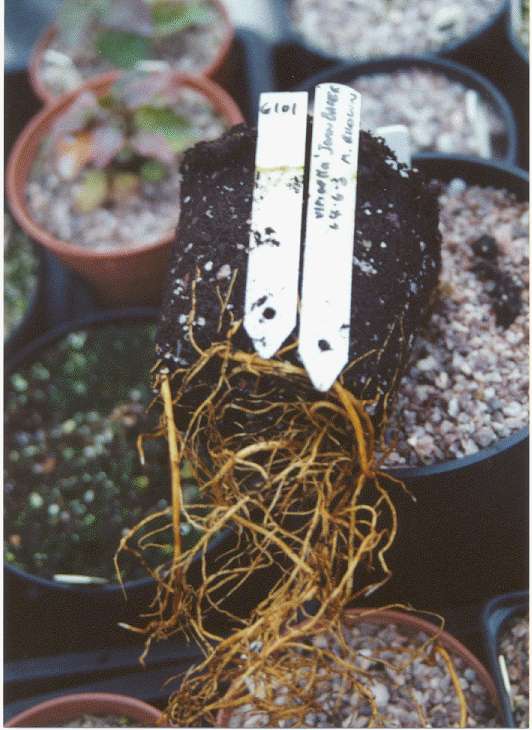
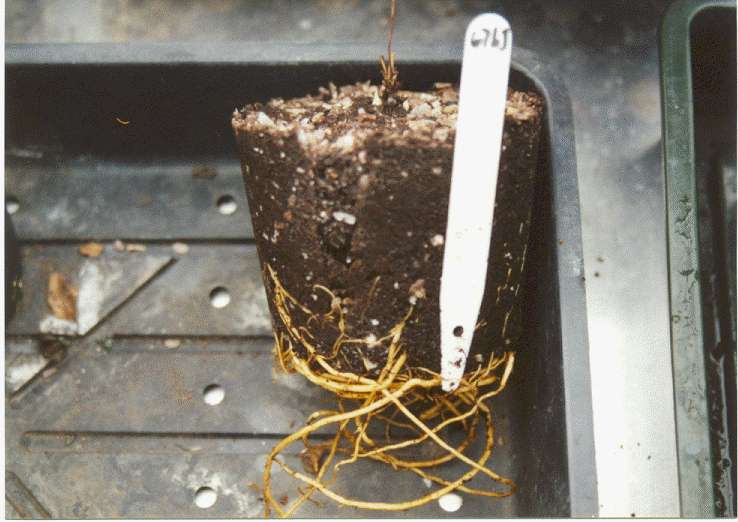
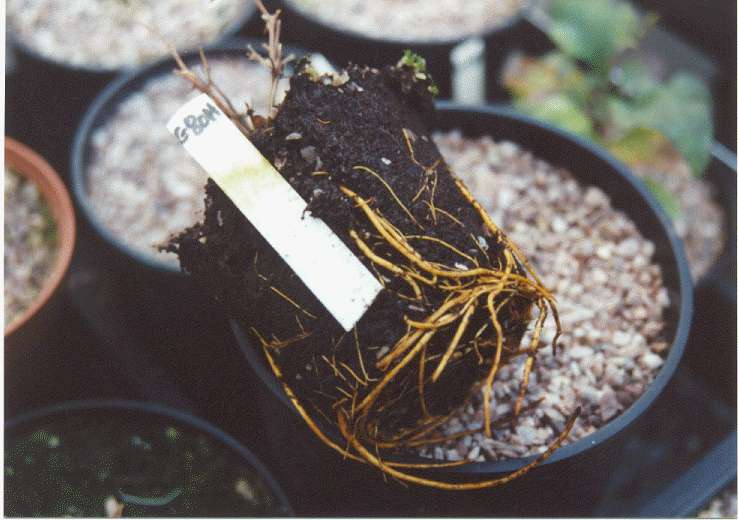
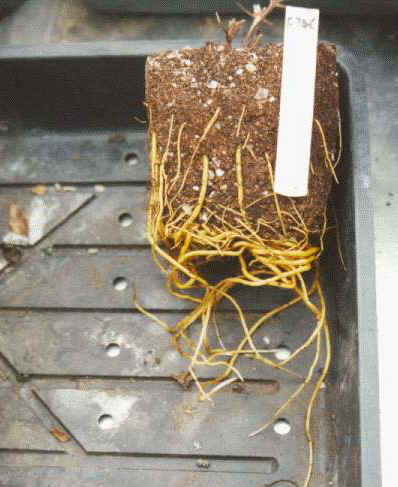
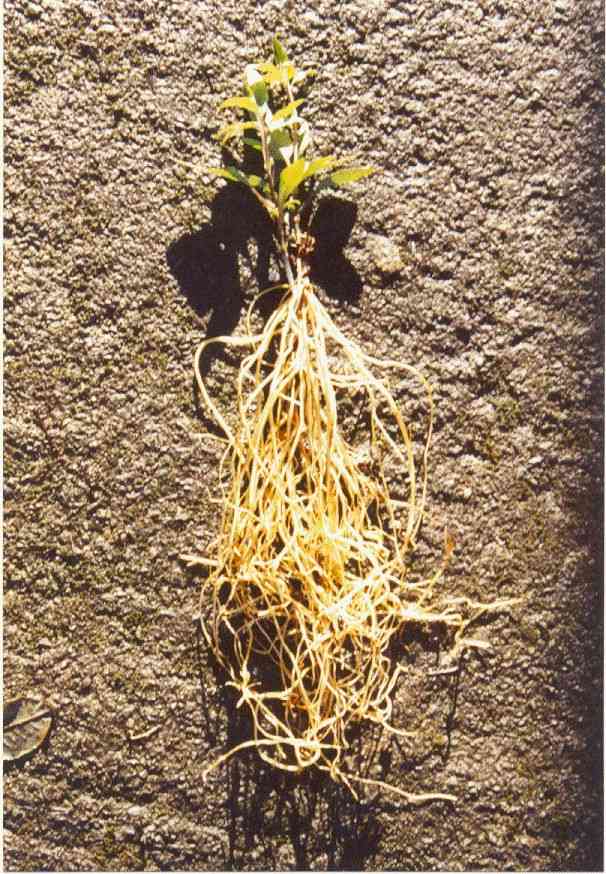
See the photos below with the germination dates and details. The photos show how rapidly a good root system is formed: To get back here click on your browser's BACK button.
1. 2. 3. 4.
5.
1. G101 seed of C. viticella "Joan Baker" germinated 20/2/00
2. G76J C. japonica germinated 3/11/99
3.G80H seed of LFH "King Edward VII" germinated 20/11/99
4.G74C C. patens germinated17/10/99
5. G59J C. pitcherii germinated 16/9/99
A regular and important task
An idea for a time around February-March: Choose a dry day; wrap up well, open your greenhouse; remove everything that is not affixed from the inside of the greenhouse, item by item, there's no rush, to another area. Carefully remove any plant pots, trays, any tools, sacks of compost, gravel, whatever, to the outside. Take out from the greenhouse any removable staging, or other storage/shelving structures, if they can be gotten outwith the door. Remove any rubbish bags or bins, then go round the base of the house removing any moss, accrued soil, any seepage deposits, any detritus of varying nature, decayed mortar, or whatever. Brush the entire interior-floor, and hand-brush all interior staging, to remove gross mud or other. Collect up and dispose of. Hand-brush the inside of the glass; carefully brush the inside of the greenhouse structures, one by one.
Stop for a cup of tea.
Resume, and purge, as far as possible with reasonable effort, the house-structures of any insects you can see nestling in nooks and crannies. Get some proprietary greenhouse disinfectant/cleaner, and spray into the corners and awkward spots, brushing as you go.
Get a bucket of hot water, some soft soap and a sponge or similar, and proceed to wash the interior glass with soapy water. Take your time. By now you'll be thinking "where have I seen something like this before?" And then you'll remember that your greenhouse last looked something like this just after it was erected!
Now re-brush the floor, and dispose. Bring back your staging, washing with soapy water each element prior to replacing back to its proper position in the house. Bring back your composts, tools, containers, other staging etc into the house. If you keep pots in trays, remove the pots from each tray, clean the tray, replace the pots back in the tray. Bring back your pots and trays, get your plants ordered, re-hang your scissors and pruners, and so forth. Top-up any pots needing fresh gravel. Replace any poor labels; re-hang a litter bag.
Have another cup of tea.
When finished, the satisfaction is good; and your plants will be very much advantaged.
Repeat the entire process in June, (one should say, 'Summer') but this time, when the 'house is completely empty, take a hose to the interior, and forcibly jet cold water into any spots where the insects/spiders make "nests", and the whole of the interior generally, glass and all. Allow to drain, overnight if need be; then when dry, spray/wipe where necessary with disinfectant, then get everything back into proper place, bring back your staging, plants and pots etc.
Doing this twice a year will keep your house in steady physical order, and produces an environment which is highly conducive to plant health and development. It also means that you're never too far from the same high standard, at any stage of the year, in exchange for only modest ongoing effort.
Link to Growth Gallery
Spring
Don't waterlog the pots; like you and me the plants like relatively steady conditions, so you'll need a reasonably periodic routine for watering and so forth. If you've got a fair number of seedlings, it might be better not to bother with watering cans or spray-bottles except for necessary individual usage. Get a hose from your outside tap and run the pipe to your 'house; fit the end with a spray gun, the type with variable (by rotating the circumference) spray outlets. One of the settings will be a fine mist - after a few tries you'll get the right balance of pressure/spray. This converts an hour's job into fifteen minutes. Try to strike the right balance of how much water to give. You'll get it right after a few tries. You don't want too much seepage, you'll remove a lot of 'good' from the soil. Liquid feeding every so often is a good idea once things are well under way.
Provide air flow in the vicinity. In the greenhouse (the typical home greenhouse) leave a window vent partially open and the door slightly ajar. But not enough to let the cats in... When the weather is hot, prevent direct sunlight by the use of greenhouse shading - the type you paint on, then wipe off after use does a good job. Hot strong sunlight will damage plants and cause rapid moisture loss. (A change this year - in order to cut down time-usage, purchased sufficient length of fine plastic greenhouse shading to completely cover houses.) We'll see if that helps, this year.
During the season prevent the accumulation of debris - make it a part of your routine to CLEAN UP after working, every time.
Even if they are still in small pots in trays, move your plants around (within their area) from time-to-time; it gives them overall balanced sunlight exposure, helps you to keep a tidy and clean environment, and gives you cause to frequently see the plants close to the eye individually, which makes it more likely that you will spot any problems early.
You need to keep an eye to the possibility of checks. The most likely is fungal problems, followed by minor pests. The first can be dealt with by being attentive, ensuring good air flow, correct moisture levels; if necessary a weak fungicide can be applied from time-to-time. In an emergency, a good systemic fungicide will usually rescue the situation, but, really, you should be able to largely prevent this problem, as long as you keep a regular eye on things. Things do however go wrong for us mortals from time-to-time so always keep good fungicides available, just in case.
Pests such as greenfly can have an effect. Make sure your young plants are observed regularly, and sprayed occasionally against insects and fungal infection. If you try to keep clean conditions, you can sometimes avoid some problems. On the other hand, its not the end of the world if a minor greenfly or fungal problem arises; you just then need to take the necessary steps to solve the problem, straight away if possible, and then proceed on again.
You'll have healthy, vigorous growth in no time, and multiple stems. See the Growth Gallery.
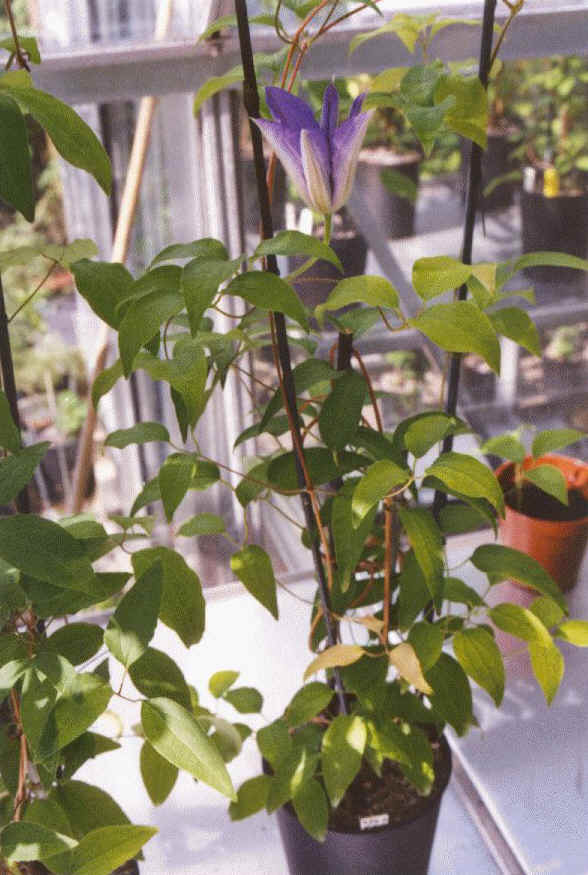
Stage 3: Coming towards flowering in the greenhouse
Hang those yellow sticky traps for whitefly, if need be. Spraying the plants occasionally with a water-spray tends to reduce the incidence of red spiders. Use smoke cones in June, July, August, occasionally, they don't harm the seedlings and can provide an extra line of defence generally. (I know I'm a heathen because I'm not yet a completely organic gardener). You can occasionally liquid-feed the plants. A good idea is the use of slow-release granular fertiliser, in moderation. The plants will benefit from a liquid feed every so often. You may well go from a 4" pot to a 1 litre pot, then to a 2 litre pot, in one season, if things go well. If you pruned to encourage a multi-stemmed plant, early-on, you'll want now to bury the clump of lower stems, when you re-pot to larger containers . By now the plants will be producing rapidly extending vines, and you may be able to see flower buds forming, (which you'll recognise quickly), once the plants have attained some degree of development.
You can use a single cane, but sometimes its better to insert into your pots; stakes, equidistant, either three or four, and try to train the vines around the stakes, as near to the horizontal as possible, (not practical with younger seedlings in small pots, see below *), gradually working up. This uses space most efficiently, keeps things tidy, reduces overlap and entanglement, allows air to circulate. There have been some good articles about why and how to do this in recent BCS and IClS Journals - especially since the IClS trip to Japan, where the topic of the art of "Andon" was well covered. (They often [not with seedlings in this sense, but with more mature plants] achieve 30-40-50 or more blooms on a potted clematis, with correct training of the vines - fantastic). You'll quickly get the hang of it once you've spent several afternoons untangling vines, and then tying them back onto stakes; after that you won't allow them to grow away willy-nilly again!
If you grow plants on staging, for light, or whatever, reasons, it will probably be necessary, in a smallish 'house, to restrict the height to some degree. Bear in mind the primary objective is to get plants to produce flowers in a manageable way. If it suits you better (maybe you don't use staging, or you just decide to remove the staging, to see how it might work out, or you have no relative height restriction) just insert long stakes into the pots and allow the plants to climb vertically until they flower, loosely attaching them to the supports, at intervals. Try both ways! Either way is fine as long as they can flower well!
* If the seedlings are very small, you will probably find it difficult to train them around; they will shoot straight up, sometimes bearing flower buds, skywards. Forcing them around tight corners will result in broken stems. However, even young clematis leaf-stems (petioles) quickly develop the ability to wrap around suitable stakes: one thing you can try is to let them attach themselves onto a central stake, then when they have become too tall for the stake, take the vine and bend it down, back along the same or, better, another stake; either tie it in (use plastic-coated wire ties) very loosely, or allow other foliage to hold it in position, until (a couple of days) the upper petioles attach themselves. After a further few days' elongation the shoot will begin to grow away vertically again, which it can be left to do, until it once again attains the height of the stakes. Then let it grow a bit further on, and then bend it down again, and re-tie as necessary.
For plants grown in numbers where space is tight: Q. How many vines are needed to produce flowers? A. Two; one for the first flower, one for insurance.
You only need two vines. Grow the vines up the stake, to the tip of the stake; allow to grow five or six inches further; bend the stems down, and anchor to a second stake, using a plastic coated tie; allow to produce a further two or three sets of leaves, then tie back to the stake; when you get near the bottom of the stakes again, allow to extend back up the stakes, tie-in where necessary. By controlling the growth and position of the vines you can keep the plant compact, whilst awaiting the flower buds. You will end up with something like this:
The plant has two vines neatly coiled up and around, the plant is compact, and in good health.
It doesn't matter if an accident happens, and you lose a vine; you have the No. 2 vine in reserve; even if you broke both vines the side buds would grow on; or you could allow new vines to come from the ground. These plants are tough.
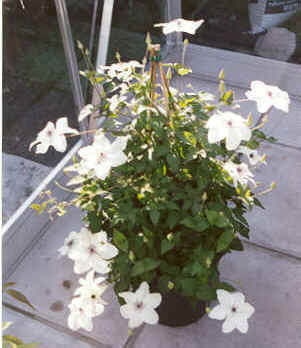
C. florida in house no.2...the vines have been trained around a wig-wam of stakes - the flowers find their own way out into the light easily enough. This is easy with a larger plant, but more difficult with young seedlings.
 At 22nd May
2000
At 22nd May
2000
Stage 4: First flowers
Sometimes you'll get flowers forming late-on in the season, especially with new plants started early in the season. You might let them persist and come to fruition - if time permits, that season - or, perhaps, you may decide to snip them off and wait until next year to give the plant a little more time, and more temperate conditions. I have had first flowers in November, occasionally, which have had to survive a baptism of gales, floods of rain, howling winds, etc, (Manchester) because they'd got to the stage where I wanted to glimpse them. But it can be better to prune, so as to cause the plants to only really think about flowering the following Spring. If you do this, make sure you keep some of this season's vine, tied to its support. Don't prune the plant to the base - keep some old vine. The old vines may have axilliary flower buds for next Spring, you don't want to lose these if possible. As soon as Spring comes these buds will grow away - you will get strong growth, healthy, early, well-formed flowers. (That's the theory; in practice you'll probably allow your early plants to flower just as soon as they will, in order to see your very first blooms!)
In some books it's said that it is an error to allow first-year flowers to form, and that it can fatally weaken a seedling. Better to wait 'til next year. So far, I haven't had too much of a problem as long as the plants are healthy; fortunately. You might see in some books also that 'its not worth bothering planting seeds in the first place'. But you'll make up your mind on that old chestnut once and for all, when you get your first flowers.
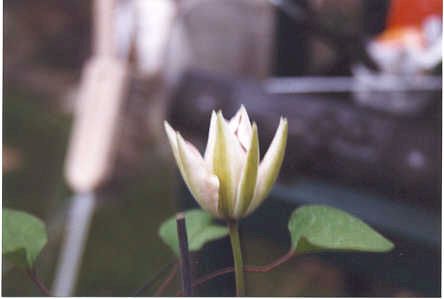
Seedling S1
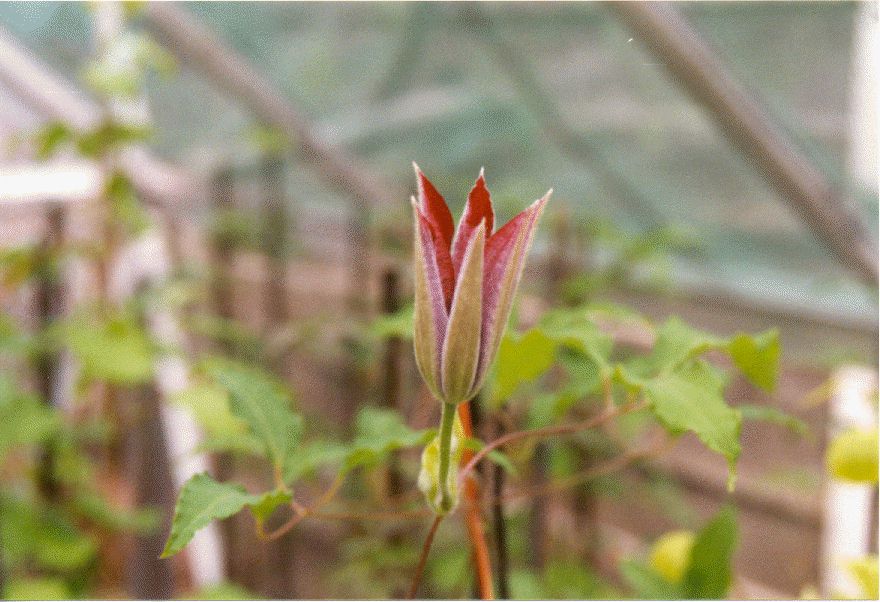
Once flower buds form, the excitement begins. If you coax young plants into flower, very early; buds appear, and then gradually enlarge and develop. After some time they attain that point where its pretty obvious that opening is imminent!! If the plants have been made to wait until the following Spring, strong, vigorous buds will often become evident on last year's vines. Or strong vines will emerge from soil level. These will develop very quickly, and by March and April (in the greenhouse) you'll have good buds, and probably flowers by May; and then intermittently through the season. See the growth gallery for a look at how the plants will come on during the season.
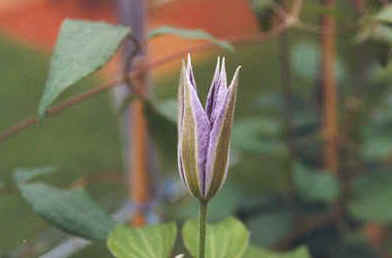 Seedling S18a
Flowers
Unless you've got some kind of crystal ball, you won't know exactly what the flowers are going to look like. You can be aware of the parental characteristics, but not, for certain, the exact traits of the seedlings. You'll wonder about the possibilities. I'm afraid to say (!) that once you've seen the first flowers of a new plant open, inevitably you'll want to see more new flowers opening! The period of culture, all the foregone time, care, attention and waiting, ceases: the sepals begin to open; a first glimpse of the main colour becomes visible; the flower opens fully and begins to mature.
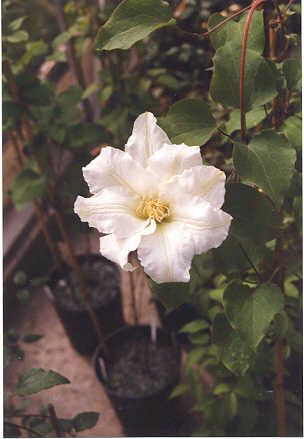
Seedling P32 - Worth waiting for!
So don't for goodness sake just plant one or two seeds - start with a dozen or more seedlings!!
Seedling G35
The main batch of LFH images so far are on pages LFH 2000 and 2001 New Flowers, 2002 New Flowers, and 2003 New Flowers.
Link to Growth Gallery
Planting new large-flowered hybrid, and species seedlings, out in the garden
How long before new plants (not the, by nature, ‘non-hardy’ types – usually the herbaceous types, as opposed to large-flowered hybrids, and many species) could go outside? Several variables.
Depending on your local conditions; the variables are things such as: vigour of plant; time of planting out; winter temperature range; periods of freezing; snow and rainfall amounts; dessication; insects; pests; diseases; soil condition; competition for nutrients and so forth. But then again, you can try to insulate; shelter; to de-weed; addition of fertilizers; pre-preparation of site; drainage; any improvements will help.
In general, if you put out (in good conditions) a batch of young, first-year plants, some will survive, but probably you will lose some, too. Plants that have already seen a full winter in the pot should survive ok, on moving into the garden - the majority should have a well-enough developed root system, by the time the second winter comes along. However, you might still hold these plants in the pots, until a month (or two, to be even more confident) before the second winter comes along. All the while in the pots, they are relatively sheltered and cosseted, and therefore advantaged; this will allow time for the root to become fairly well developed, which in turn will lead to faster and better establishment, when they do eventually go out.
In general, try to plant-out in the Spring, or the early Autumn; the plants then get a sufficient period, in the best conditions, for the establishment of the root. The establishment of the root is key: the performance of the plant is directly related to the health and strength of the root.
Plants that have seen two winters in the pot, before they go out to face the third, should really be absolutely fine, all things being equal. You are pretty unlikely to lose any, though you might occasionally lose the odd one, from time to time. So I would let any seedling see two winters in the pot, if I wanted to be certain.
If really pressed, for space, or whatever reason, then plants may be put out after one winter, with attention, in good conditions. Some really vigorous plants are actually quite fine after only one winter; this is as pertaining to the relatively mild Winter conditions in my location – Northern England. If you are in a much colder climate, you’ll want to give the plants more time in the pots, to get them really established, before they go out. Also, you’ll profit from getting them into the garden a good month or two before the onset of Winter, to give them time to get their feet into the ground properly.
Good luck with raising your own clematis from seed.
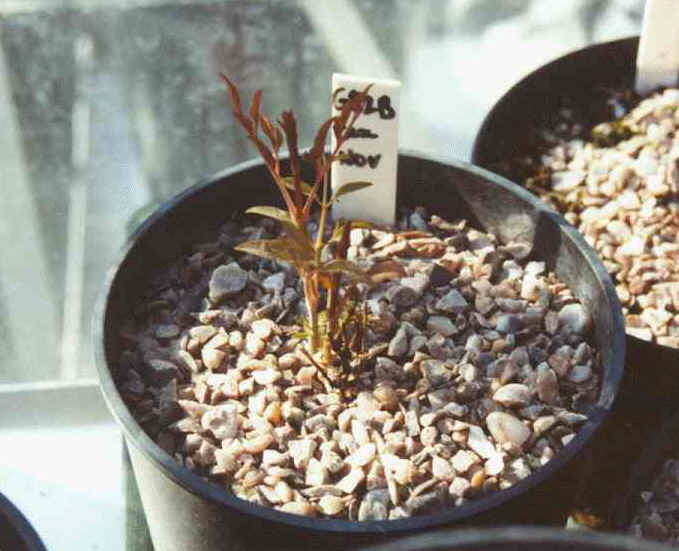
C. texensis seedling, re-emerging into first Spring, after germination the previous Autumn.
HOME page